


Razorpay has become India’s go-to payment solution, thanks to its acceptance of UPI, debit/credit cards, wallets, EMI, and netbanking. It’s trusted by millions of Indian shoppers and gives merchants smooth “INR settlements” while staying fully compliant with RBI guidelines.
Needless to say, it has become a top favorite for Indian Shopify sellers who want a reliable gateway that balances customer trust with business scalability, while reducing common frictions.
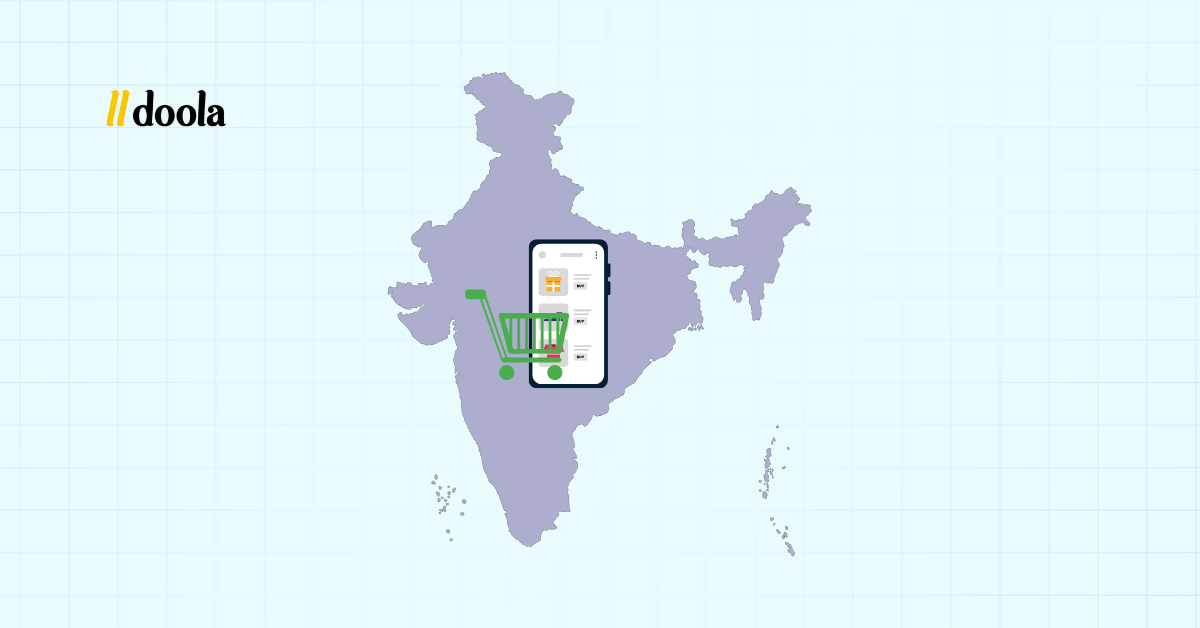
In today’s doola guide, you’ll learn step-by-step how to set up Razorpay on Shopify, avoid common setup pitfalls, and optimize your checkout and payment flow for maximum conversions.
And if keeping your books tidy alongside those payments feels overwhelming, doola is ready to step in and help you stay compliant, organized, and future-proof while you can focus on selling.
🔖 Related Read: Shopify Q2 Earnings Jump 20%: Where Shopify Sellers Should Focus Next
Why Choose Razorpay for Shopify in India?
Razorpay has carved its niche in India’s digital payments landscape, and for good reason.
Here’s why it continues to be the go-to payment gateway for Indian Shopify merchants in 2025:
Wide Payment Coverage
Razorpay supports India’s most popular payment methods: UPI, credit and debit cards, EMI, digital wallets, and netbanking. This ensures that no customer walks away simply because their “preferred payment option” was not available.
Competitive Fees & INR Settlements
With transparent pricing and no hidden surprises, Razorpay keeps things straightforward for sellers. Funds are settled quickly and directly into your Indian bank account, giving you steady cash flow to reinvest into your business.
Fast settlements ensure you can scale without hitting liquidity roadblocks.
Customer Trust
Indian shoppers know and fully trust Razorpay’s checkout experience. The familiar interface reduces hesitation at the point of payment, cutting down cart abandonment rates. These safe checkouts directly translate into successful transactions.
Local Compliance
Backed by RBI regulations, Razorpay ensures that every transaction ticks the right legal boxes.
From GST-compliant invoices to secure handling of customer data, it provides merchants with the peace of mind that they’re operating within India’s regulatory framework. This ensures a solid foundation for long-term growth.
Now, let’s find out how Razorpay stacks up against its competitors when integrated with Shopify.
Razorpay vs. Competitors: Shopify Integration in India
Feature
Razorpay
PayU
Cashfree
Stripe (via US entity)
Supported Payment Methods
UPI, Cards, EMI, Wallets, Netbanking
Cards, Wallets Netbanking
Cards, Wallets, Netbanking, UPI
Cards, wallets (no UPI in India)
Transaction Fees (Domestic)
~2%–2.36% + GST
~2%–2.36% + GST
~2%–2.36% + GST
2.9% + FX conversion
Settlement Cycle
T+2 days
T+2 days
T+2 days
T+7 days (cross-border)
Shopify Integration Ease
✅ Native
⚠️ Semi-native
⚠️ Semi-native
Not available for the Indian entities
International Payments Support
✅ Yes
⛔ Limited
⛔ Limited
Yes (via US entity only)
Verdict:
Razorpay clearly takes the lead for Indian Shopify sellers, mainly because of its UPI-first approach, seamless native integration, and strong compliance backing.
While other competitors like PayU or Cashfree offer solid alternatives, they often lack the same depth of “Shopify-native features” or brand recognition that Razorpay enjoys among Indian customers.
🔖 Related Read: Shopify for Beginners: How to Accept International Payments in Shopify in 2025
Prerequisites Before Setting Up Razorpay on Shopify
Before diving into the technical steps of integration, make sure you have the essentials in place:
An Active Shopify Store (Basic Plan or Above)
You’ll need a live Shopify store with at least the Basic plan to integrate Razorpay.
If you’re still on a trial plan, consider upgrading to avoid disruptions during the setup process.
This ensures you have access to Shopify’s payment settings and can properly connect “third-party gateways”.
A Razorpay Account with Completed KYC

Razorpay requires a fully activated account to process payments.
That means you must complete the KYC (Know Your Customer) verification process, which validates your identity and business details. Without KYC approval, you cannot receive settlements in your bank account.
KYC Documents
Prepare your key documents in advance for a smoother application. You’ll need your PAN card and Aadhaar card along with your business registration proof if you’re operating as a company.
If you’ve crossed the GST threshold, a GST certificate will be mandatory. Razorpay also asks for bank proof, such as a canceled cheque/bank statement, to confirm your settlement account.
An Indian Bank Account in INR for Settlements
All Razorpay settlements are made directly into an Indian bank account denominated in INR. This requirement applies whether you’re an individual seller or a registered business.
We recommend having a dedicated business account is advisable, as it simplifies reconciliation.
| 📌 Important Note for Sellers:
You can operate as an individual seller without GST registration if you’re below the threshold turnover. But this comes with limitations. You can’t claim Input Tax Credit (ITC) and there will be restrictions on scaling. |
Approval Timelines
Once you’ve submitted your KYC documents, Razorpay typically takes 2–4 business days to verify and activate your account.
Delays can occur if documents are missing or unclear, so always make sure you double-check before uploading to avoid back-and-forth communications.
Step-by-Step Guide: How to Set Up Razorpay on Shopify
Shopify’s integration with Razorpay makes the entire setup process simple. Follow this roadmap carefully, and with just a few clicks, you can link all your accounts and start accepting payments.
Step 1: Login to Shopify Admin With Your Credentials

The Shopify admin dashboard is your control center that lets you add, activate, or customize payment providers. If you are starting from scratch, you’ll see Shopify’s default payment options.
For now, just scroll to Settings and click Payments in the dashboard. Basically, this is where Shopify organizes your payment options, from domestic gateways to “international integrations”.

Step 2: Select Razorpay as Payment Provider

Shopify supports a range of third-party payment gateways, and for Indian merchants, Razorpay is natively available. Under “Choose Provider”, you’ll see a complete list of payment providers.

Scroll all the way down and select Razorpay India.

Step 3: Generate & Copy API Keys in Razorpay
Next, you actually need to connect Shopify and Razorpay. Just follow these steps:
Log into your Razorpay Dashboard.
- Go to Settings → API Keys.
- Click Generate Key.
- Razorpay will give you two pieces of information:
- Key ID → This acts like a username (public identifier).
- Key Secret → This is the password (private code) that must be kept secure.
- Copy Key ID (public identifier) and Key Secret (private access code).

📌 Tip: Treat your Key Secret like you would an ATM PIN. Never share it publicly.
Step 4: Paste Your API Keys into Shopify

Once you get the API keys, you need to plug them into Shopify:
- In your Shopify Payments settings, enter the Key ID and Key Secret exactly as they appear in Razorpay.
- Double-check for typos, an incorrect character will break the connection.
- Hit Save to confirm.
Step 5: Save Your Settings and Enable Test Integration

Before you go live, you need to test the end-to-end checkout flow, just like a real customer. Razorpay provides a Test Mode where you can simulate payments without moving real money.
- Switch Razorpay to Test Mode and enable it as your active provider.
- Create a test order in your Shopify store, use a test UPI handle or card number to replicate a real payment.
- Proceed to checkout → select Razorpay as your payment method.
- Enter your test card details to complete the payment process.
This step ensures your customers won’t face failed checkouts when your store is live.

Go ahead and verify that the “test order” is successfully processed in your Shopify dashboard.

Step 6: Go Live with Razorpay
Only when your test checkout is successful, you can go live and start accepting payments on Razorpay.
- Change from Test Mode → Live Mode in your Razorpay dashboard.
- Update your API keys in Shopify with the Live Key ID and Live Key Secret (different from the test ones).

- Place a small real transaction from your store (e.g., INR 1 or INR 10 order) to verify that payments settle correctly in your Razorpay account.
Congratulations, you’re now officially live and ready to accept payments from “real customers”!!
| ⚡ doola tip for first-time users
Key ID = your store’s “username” with Razorpay. Key Secret = your store’s “password” with Razorpay. Keep them secure, and avoid sharing them with anyone outside your team. |
Common Errors and Troubleshooting
Even with Shopify’s straightforward integration and Razorpay’s reliability, small hiccups can get in the way. But relax, most issues are easily fixable once you know exactly what’s causing them.
Let’s walk you through the most common problems merchants face when connecting Razorpay with Shopify, and how to resolve them like a pro.
API Key Mismatch
The Issue: If the Key ID and Key Secret pasted into Shopify don’t match the ones in your Razorpay dashboard, the integration will fail.
How to fix:
- Head to Razorpay → Settings → API Keys.
- Regenerate fresh API keys (if you’ve lost or compromised them).
- Paste the new keys carefully into Shopify’s Razorpay settings.
- Save changes and test again.
📌 Pro Tip: Always copy-paste API keys directly. Typing them manually often introduces errors.
Incomplete KYC Verification
The Issue: Razorpay may let you activate your account and even process payments, but if your KYC isn’t fully verified, settlements to your bank will be delayed or withheld.
How to fix:
- Upload all required documents (PAN, Aadhaar, business proof, GST, and bank details) in Razorpay’s dashboard.
- Track your KYC status inside your profile section.
- Once verified, settlements typically resume within T+2 business days.
Razorpay Not Showing in Checkout
The Issue: You’ve added Razorpay as a payment provider, but customers don’t see it at checkout.
✅ How to fix:
- Go to Shopify Admin → Settings → Payments and check if Razorpay is toggled ON.
- Ensure you’ve entered valid API keys (not test keys while in Live Mode).
- If you’re using multiple payment gateways, make sure Razorpay hasn’t been overridden by another provider.
Currency Mismatch Errors
The Issue: Razorpay for Indian merchants only supports INR transactions. If your Shopify store’s base currency is set to USD (or anything else), payments will fail.
✅ How to fix:
- Change your Shopify store’s base currency to INR.
- If you want to sell globally, you can enable Razorpay’s international payments feature or use a second gateway like Stripe (via a US entity).
Error Codes and Their Fixes
Razorpay provides error codes when your transactions fail. Here are the most common ones:
- INVALID_SIGNATURE
- Cause: API keys don’t match or weren’t entered correctly.
- Fix: Re-check your Key ID and Key Secret, regenerate if necessary, and paste them again in Shopify.
- DUPLICATE_ORDER_ID
- Cause: The order reference ID you’re using has already been processed.
- Fix: Generate a fresh order ID for every transaction. Shopify usually handles this automatically, but if you’re using custom apps or integrations, confirm they aren’t reusing IDs.
With these troubleshooting tips, you’ll be able to quickly identify and resolve errors without losing sales or spending hours on support tickets.
Optimizing Razorpay on Shopify for Better Conversions
Once your Razorpay payment gateway is live on Shopify, the next step is to fine-tune it for maximum conversions. Implement all of these key strategies to unlock Razorpay’s full potential:
1. Set UPI as the default payment option

UPI is India’s most trusted and widely used digital payment method, accounting for over 50% of all online transactions.
By setting UPI as the default, you remove friction for customers who prefer quick, hassle-free payments. This boosts conversion rates and lowers cart abandonment.

2. Enable EMI & Buy Now Pay Later (BNPL)

Flexible payment methods like EMI and BNPL give shoppers more spending power.
Customers who may hesitate on higher-ticket items are more likely to convert when they can spread payments over time. This increases your average order value and improves repeat purchases.
3. Customize checkout branding to match your store
Consistency builds trust. Razorpay allows you to customize the checkout page with your logo, brand colors, and style.
A branded checkout reduces the sense of “handoff” to a third party, making customers feel secure and connected to your store throughout the entire buying journey.

Head over to your Razorpay dashboard, navigate to Account & Settings → Checkout Settings → Branding, and start customizing.
A few thoughtful tweaks here can directly boost your conversions while creating a smoother, more trustworthy experience for all your customers.

4. Use Razorpay Smart Collect to encourage prepaid orders
Cash-on-delivery (COD) is notorious for cancellations and return costs.
Razorpay’s Smart Collect feature helps you create unique payment links and virtual accounts, nudging customers toward prepaid transactions. This cuts COD-related risks and minimizes operational headaches.
5. Leverage Razorpay’s analytics for continuous improvement
Razorpay provides powerful insights into payment success rates, checkout drop-offs, and customer behavior patterns.
By digging into this data, you can pinpoint where customers are abandoning their carts, detect friction in the checkout flow, and take steps to fix the weak points.

For example, you can perform a detailed analysis of the recent transactions. You can even view the details of each payment method by clicking on the options like Cards, UPI and Netbanking.

As shown above, you can also view the total payment volume distribution and understand the main reasons behind payment failures, e.g., incorrect CVV, insufficient funds, cancellations, etc.
Follow these steps to view your RazorPay Analytics Dashboard:
- Log in to the dashboard with your credentials.
- Next, click on Transactions → Success Rate.

Next, you can also use the following filtering options to view success rates for your transactions:

So, by optimizing Razorpay on Shopify, you’re not just processing payments, you’re building a seamless, reliable, revenue-boosting checkout experience that turns browsers into loyal buyers.
Compliance & Tax Considerations for Indian Shopify Sellers
Selling online in India comes with responsibilities. Whether you’re a solo seller or running a registered company, understanding the tax framework ensures you avoid penalties, claim benefits, and keep your books clean.
Let’s break down what Shopify sellers in India must know:
GST Registration: The First Step to Compliance
For Indian sellers, GST registration is a legal mandate once your turnover crosses INR 40 lakh yearly for goods or INR 20 lakh for services.
Without it, you cannot legally charge GST on your sales or even claim Input Tax Credit (ITC) on business expenses, which affects your profitability.
So, if you sell handcrafted home décor online and your sales touch INR 42 lakh in a year, GST registration is a must that allows you to pass on GST to your customers and remain audit-ready.
GST on Razorpay Fees
Every transaction processed through Razorpay comes with a gateway fee, typically around 2%, and an additional 18% GST on that fee.
While this may sound like just another cost, the GST portion is fully claimable as Input Tax Credit (ITC) if you’re GST-registered.
📌 Here’s how it works in practice:
Say you process orders worth INR 1,00,000. Razorpay deducts INR 2,000 (2% fee), adds INR 360 as GST (18% of INR 2,000), bringing the total deduction to INR 2,360.
Instead of losing that extra INR 360, you can claim it back as ITC in your GST filing, lowering your overall tax burden.
How to Create GST Invoices With Razorpay
Step 1: Sign up or log in to the Razorpay dashboard with your credentials (shown in the image).

Step 2: On the left-hand side of your dashboard, click on the option labeled as “Invoices”.
Step 3: Next, click on “Get Started” to begin the process of creating a GST complaint invoice.

Step 4: On the right hand side of your dashboard, you will click on the “Create Invoice” button.

Step 5: Under “Configure Invoices” you will now find an option to select your “Invoice Label”.

Step 6: Choose your “currency” and input further details like date, address, product details, etc.
🔖 Related Read: How to Set Up a Shopify Payment Gateway Without a U.S. Address

On the right hand side of your Razorpay dashboard you can also select from a list of add-on features like an option to add GST details, ‘enable partial payments’, ‘change invoice label’, etc.
Step 7: Click on “Finalise and Issue” once you’re done adding the above details (refer image).
Step 8: Once you submit, you see a pop-up confirmation. Click on “Issue Invoices” to confirm.

Once you confirm, your customer will receive an invoice. As a final hygiene step, navigate to your Razorpay dashboard to view the status of all your invoices. Congratulations, you’re all set!
✅ TDS & TCS Rules
When selling online in India, you’ll encounter both TCS (Tax Collected at Source) and TDS (Tax Deducted at Source). Shopify collects 1% TCS (on sales) and deposits it with the government.
Per your business structure, Razorpay may also deduct 1% TDS on the payments it processes.
For example, if you make a sale of INR 10,000, Shopify deducts INR 100 as TCS and Razorpay deducts INR 100 as TDS. This leaves you with a net settlement of INR 9,800 before their fees.
While this reduces your immediate cash flow, both TCS and TDS are creditable against your final tax liability, meaning, you don’t lose the money, it simply shifts into the compliance system.
📌 Note: Razorpay X users can automate (or auto-debit) their TDS deductions as shown below.

Settlement Reports & Monthly Reconciliation
Razorpay provides detailed settlement reports that outline every aspect of your transactions, from order values and fees to taxes deducted and the final payout you receive.
Make sure to reconcile these reports with Shopify’s sales data every month so your records remain accurate. This highlights discrepancies and prevents unpleasant surprises during GST or your tax audits.
A common best practice here is to automate your reconciliation through tools or professional bookkeeping services (e.g., doola Bookkeeping), as “manual tracking” may lead to costly errors.

Use Case Scenarios for Different Types of Sellers
| Seller Type | Compliance Requirement | Pros | Cons | Example |
| Individual Seller (No GST) | Can operate without GST until threshold | Easy to start, less paperwork | Can’t claim ITC, limited scalability | A hobbyist selling INR 15L worth of apparel |
| Registered Indian Company | GST + TDS + TCS compliance is a must | Can claim ITC and scale faster | More paperwork, strict compliance | Pvt Ltd selling INR 60L worth of electronics |
| US entrepreneur selling in India | Needs Indian entity + Razorpay account for INR settlements | Access to India’s e-commerce market | Requires local compliance plus entity setup | A US-based skincare brand selling INR 1Cr per year in India |
Now navigating GST, TDS, and other legalities is easier said than done. But why waste time on boring admin tasks when doola can take bookkeeping, tax filing, and compliance off your plate?
How doola Helps Indian Shopify Entrepreneurs in the US

Taking your Shopify store global isn’t just about selling across borders, it’s about building a structure that scales with you. And that’s right where doola steps in as your partner for growth.
With doola’s full-service solutions, you can:
- Form a US LLC to unlock Stripe/PayPal, providing access to seamless global payments.
- Leave bookkeeping and tax compliance to the tax experts so your records stay updated.
- Reconcile Razorpay settlements with your US and Indian operations for clear reporting.
With our experts by your side, you’re not just collecting payments, you’re building a compliant, scalable, and global-ready brand.
Sign up to get started with doola today.
FAQs

Can I use Razorpay on Shopify without a registered business in India?
Yes, individuals can sign up, but GST registration is recommended for scaling.
What documents are required for Razorpay KYC verification?
PAN, Aadhaar, bank proof, and business registration docs (if applicable).
How long does it take for Razorpay settlements to reach my bank?
Usually T+2 business days.
Does Razorpay support international cards on Shopify?
Yes, but requires enabling International Payments in Razorpay dashboard.
Can I use multiple payment gateways on Shopify India (Razorpay + COD)?
Yes, you can combine Razorpay with COD or PayPal (for international buyers).
What are Razorpay’s transaction charges for Shopify merchants?
~2%–2.36% + GST for domestic transactions; higher for international cards.
How do I switch from test mode to live mode in Razorpay on Shopify?
Go to Razorpay Dashboard → Settings → Switch to Live Mode → Update API keys in Shopify.

Table of Contents
Why Choose Razorpay for Shopify in India?Prerequisites Before Setting Up Razorpay on ShopifyStep-by-Step Guide: How to Set Up Razorpay on ShopifyCommon Errors and TroubleshootingOptimizing Razorpay on Shopify for Better ConversionsCompliance & Tax Considerations for Indian Shopify SellersHow doola Helps Indian Shopify Entrepreneurs in the USFAQsForm Your Construction
Business with doola


