![Shopify for Beginners: How to Accept International Payments in Shopify in [year]](https://doolastaging2.wpenginepowered.com/wp-content/uploads/2025/11/banner-cta-new.png "Shopify for Beginners: How to Accept International Payments in Shopify in [year]")
The Easiest Way to Start and Scale Your U.S. Business.

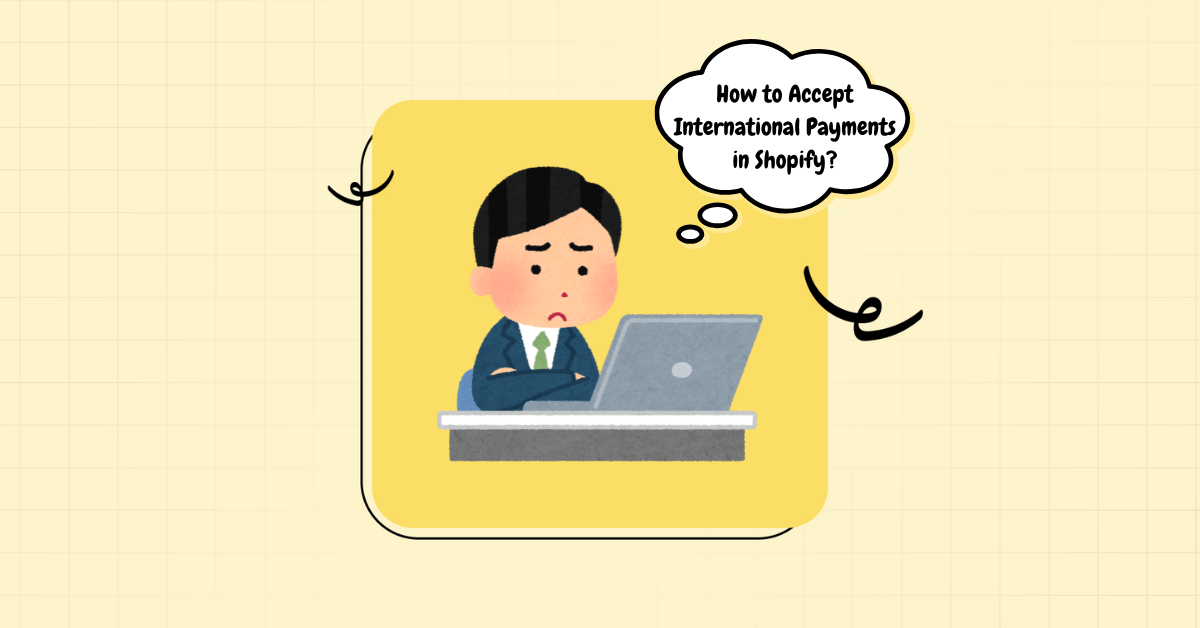
Shopify is global by design, but getting paid from anywhere in the world isn’t always straightforward with this platform.
If you’re a beginner setting up a Shopify store, or a non-US entrepreneur aiming to sell worldwide, you’ve likely run into a few roadblocks:
- Customers abandoning carts because they can only pay in USD.
- Restrictions because Shopify Payments isn’t available in your country.
- Headaches around VAT, GST, or connecting the right bank account.
Rest assured, you’re not alone. Many first-time Shopify sellers hit the same snags.
By the end of today’s guide, you’ll know exactly how to accept international payments in Shopify step by step, which payment gateways work best and how doola helps you avoid the compliance traps that trip up beginners.
What Does “Accepting International Payments” in Shopify Actually Mean?
For beginners, “accepting international payments” can sound as simple as letting someone swipe a credit card from another country.
In reality, it’s much more layered.
To sell globally, you need to think beyond the transaction and create a frictionless experience for customers no matter where they shop from. That means 3 key things:
1. Let Customers Pay in Their Own Currency
It’s frustrating for your buyers when you force international customers to pay only in USD when they try making a purchase from your Shopify store.
Instead, when customers shop in their familiar currency, they:
- Instantly understand pricing without needing a calculator.
- Trust the checkout process more.
- Are far less likely to abandon their cart.
Example: A customer in Germany expects to see prices in EUR, a shopper in India in INR, and a buyer in the US in USD.
On Shopify, this is handled through multi-currency settings inside Shopify Markets or through integrated payment gateways that support currency localization.
2. Support Local Payment Methods
Credit cards may dominate in the US, but that’s not the case everywhere.
In fact, localized payment methods often drive higher conversions than credit cards in their home markets.
- Europe: SEPA Direct Debit is widely used for recurring payments and online transactions.
- Brazil: PIX, a government-backed instant payments system, is the most popular method.
- India: UPI (Unified Payments Interface) dominates everything from groceries to luxury goods.
- Global Wallets: Apple Pay and Google Pay have become everyday checkout staples.
By offering local payment methods, you’re essentially speaking the customer’s financial “language.” This leads to more completed checkouts, lower chances of failed payments, and better customer experience.
3. Stay Compliant with Local Taxes
Selling internationally automatically means staying compliant with each region’s tax requirements. This is often where beginners feel overwhelmed, but it’s non-negotiable if you want to avoid penalties or blocked sales.
- European Union (EU): Value-Added Tax (VAT) applies to both digital and physical goods, with thresholds for when you must collect and remit.
- Asia-Pacific: Countries like Australia, India, and Singapore enforce Goods and Services Tax (GST) on imports and online sales.
- United States: Sales tax is managed at the state level, meaning different rules for different states.
Why this matters:
- Customers get transparency at checkout when taxes and duties are calculated upfront.
- You avoid surprise penalties, audits, or frozen accounts.
- Shoppers trust your brand more when pricing is accurate and fair.
Shopify Markets can automate much of this tax calculation, and Merchant of Record platforms (like Paddle) can take compliance entirely off your hands.
🔖 Related Read: Shopify Q2 Earnings Jump 20%: Where Shopify Sellers Should Focus Next
Shopify’s Built-In Tools for International Payments
Before you start exploring third-party solutions, it’s worth understanding what Shopify already offers out of the box.
Shopify has invested heavily in making global selling easier for merchants, but the availability of these tools depends on your location and your setup.
Let’s break down the 2 most important built-in features that can make or break your international sales strategy.
Shopify Payments
Shopify Payments enables smooth, native transactions on your store. Since it’s directly integrated into Shopify, it eliminates the need for third-party processors.
✅ Supported Countries: Shopify Payments is available in many major markets, including the US, Canada, most of the EU, Australia, Japan, and a handful of others. However, large parts of Asia, Africa, and the Middle East still don’t have access.
Currencies: Supports over 130 currencies, so customers can shop in their home currency and you can receive payouts in your chosen settlement currency.
Pros:
- Frictionless checkout experience since it’s fully native to Shopify.
- Lower transaction fees compared to third-party gateways.
- Supports major credit cards as well as digital wallets like Apple Pay and Google Pay.
Cons:
- Availability is limited to certain countries.
- Requires a local entity and banking presence in eligible countries.
It is ideal for beginners in supported regions who want simplicity and fewer moving parts when handling payments.
Shopify Markets
Shopify Markets is the toolkit that helps you actually drive into global markets. It’s Shopify’s centralized solution for managing cross-border sales from one dashboard.
Key Features:
- Multi-Currency Pricing: Automatically shows prices in a shopper’s local currency.
- Localized Domains: Customize storefronts for different countries (e.g.,.de for Germany).
- Tax & Duty Collection: Shopify automatically calculates VAT, GST, and duties, ensuring compliance.
- Language Customization: Translate your storefront for different regions.
Pros:
- Seamlessly integrated with Shopify, no need for third-party apps.
- Helps build trust with local buyers through currency, tax, and domain localization.
- Reduces cart abandonment by handling complexity automatically.
Limitations:
- If Shopify Payments isn’t available in your country, Markets won’t solve that problem. You’ll still need to use an external payment provider.
- Advanced customization may require add-ons or third-party tools.
Now, if Shopify Payments isn’t available in your country, or if you’re looking for more advanced options, you’ll need to turn to alternative payment gateways and Merchant of Record models.
🔖 Related Read: The Ultimate Guide to Shopify Bookkeeping: Tools and Tips for Store Owners
Step-by-Step: How to Accept International Payments in Shopify
In this section, we walk you through the exact steps, from enabling Shopify Payments to testing your checkout, so you can go global with confidence.
Here’s your roadmap:
Step 1: Choose the Right Settings & Verify Your Store Details

Go to Shopify Admin → Settings → Payments
- Owner permissions: Only the store owner (or users with finance permissions) can activate/modify payment gateways.
- Plan & checkout: Make sure you’re on a plan that supports the methods you want (Shopify, Advanced, Plus), and that Shop Pay and accelerated wallets are enabled if available.
💡 Pro tip: Set your statement descriptor (how your brand name appears on card statements) early to reduce chargebacks from “unrecognized charges.”
Step 2: Enable Shopify Payments (If Eligible) & Complete Verification

Go to Settings → Payments → Shopify Payments → Activate
What you’ll need:
- Legal details: Business legal name, business address, website.
- Identity verification: Government ID, DOB, and details for beneficial owners (KYC/AML rules).
- Banking: Account holder name and a business bank account where payouts will land.
- Tax information: Depending on the country, you may need an EIN/tax ID.
Fill out all the necessary business information, bank details, personal details, and complete your account setup.

What to configure next:
1. Payout schedule (daily/weekly/monthly) to match cash-flow needs: Follow these exact steps:
- In the Shopify Payments section, click Manage.
- Scroll down until you see the Payouts section. Under Payout Schedule, you’ll find your options.
- Choose how often you want to get paid:
- Every Day: Get payouts daily (minus weekends and bank holidays).
- Every Week: Pick the exact day of the week for your payout.
- Every Month: Select the specific date of the month you want payouts to hit your account.
- Click Save to lock in your new payout schedule.
💡Pro Tip: Weekly or monthly payouts can make cash flow easier to track, while daily payouts keep money moving into your account faster.
2. Capture method: You’ll have the following options:
- Automatic capture (funds captured at checkout; simplest).
- Manual capture (authorize now, capture later; useful for preorders or partial fulfillment).
3. Wallets & local methods: Turn on Apple Pay/Google Pay and any available local payment methods for your regions.
- 3D Secure / SCA: Ensure it’s enabled where required (EU/UK) to cut fraud and liability.
Now, Shopify Payments will show as “Active”, and you’ll see “Manage with currencies”, “methods”, and “payout settings” available.
If you’re not eligible: Skip ahead to Step 5 to add third-party gateways.
Step 3: Turn On Shopify Markets & Add Your Target Regions
Go to Settings → Markets → Add multiple currencies
What to do:

1. Enable Shopify Markets:
- From your Shopify Admin Dashboard, go to Settings > Markets.
- You’ll see your default market (usually your home country).
- Click Enable Shopify Markets to sell internationally from one central dashboard.
2. Add and Configure Currencies
- In the Markets section, click on your primary market.
- Go to Products and Pricing.
- Under Currencies, use the dropdown to select the currencies you want to display for international customers (e.g., EUR, INR, GBP).
- Switch to Price Rounding to keep your prices looking clean and professional.
3. Customize and Test
- Install a currency selector if your theme doesn’t already have one. You can find currency converter apps in the Shopify App Store.
- Test your setup by viewing your store as an international customer would. Use a VPN to simulate visiting from different countries and make sure:
- Prices display in the correct currency.
- Checkout works seamlessly without errors.
Always double-check both desktop and mobile versions of your store. International buyers often shop on mobile, and a smooth checkout experience there is crucial.
| ⚡ doola Tip: Localize domains/subfolders (e.g., yourstore.com/de or yourstore.de) and set languages if you plan to translate content, as shown in the image below. |
![Shopify for Beginners: How to Accept International Payments in Shopify in [year]](https://www.doola.com/wp-content/uploads/2025/09/image-34.png "Shopify for Beginners: How to Accept International Payments in Shopify in [year]")
💡 Pro tip: Start with your top 1–3 markets (where demand/shipping margins are best) before expanding everywhere.
Step 4: Configure Currency Strategy: Conversion, Pricing, & Rounding
![Shopify for Beginners: How to Accept International Payments in Shopify in [year]](https://www.doola.com/wp-content/uploads/2025/09/image-37.png "Shopify for Beginners: How to Accept International Payments in Shopify in [year]")
Go to Settings → Markets → (Select a Market) → Currencies & pricing
What are the main options?
- Automatic conversion: Shopify converts from your base currency using current rates. Quick to launch, minimal upkeep.
- Manual pricing by market: Set fixed prices per product/market (via price lists/CSVs) if you want tight control over psychological price points (e.g., €29.99 vs. the auto-converted €30.47).
- Rounding rules & price adjustments: Apply rounding (e.g., to .99) and add a % adjustment per market to cushion FX volatility and local fees.
Under Products and Pricing, you can adjust prices for specific markets as shown below.
![Shopify for Beginners: How to Accept International Payments in Shopify in [year]](https://www.doola.com/wp-content/uploads/2025/09/image-38-1080x465.png "Shopify for Beginners: How to Accept International Payments in Shopify in [year]")
Which option should you choose and when?
- Use auto conversion to launch fast.
- Switch key SKUs to manual prices in high-volume markets to protect margins and aesthetics.
Always assign SKU and HSN codes to your products for compliance and efficient inventory management. To update, select the product you want to edit and adjust the following details:
![Shopify for Beginners: How to Accept International Payments in Shopify in [year]](https://www.doola.com/wp-content/uploads/2025/09/image-39.png "Shopify for Beginners: How to Accept International Payments in Shopify in [year]")
Step 5: Add Alternative Gateways (PayPal, Stripe, Wise)
Go to Settings → Payments → Add payment method
![Shopify for Beginners: How to Accept International Payments in Shopify in [year]](https://www.doola.com/wp-content/uploads/2025/09/image-40.png "Shopify for Beginners: How to Accept International Payments in Shopify in [year]")
What to add & why?
1. PayPal Checkout: Instant global trust + one-tap checkout for PayPal users. Connect your PayPal Business account.
2. Stripe (where available): Unlocks 100+ local methods (e.g., SEPA, iDEAL, Bancontact) and robust fraud tools.
3. Regional payment options:
- Razorpay (India): UPI, netbanking, wallets, required for INR conversions.
- Klarna (EU): Buy-Now-Pay-Later to boost AOV and conversions.
4. Payout optimization (not checkout): Wise or Payoneer to receive funds in multiple currencies and convert at better FX rates before you withdraw locally. (These aren’t customer checkout gateways; they optimize your back-end money flow.)
Order of Operations
- Keep Shopify Payments as primary (where eligible).
- Add PayPal as an alternative.
- Layer in Stripe/regional methods for local coverage.
💡 Pro tip: Avoid adding too many options at once, feature creep can clutter checkout. Start with the top 1–2 your customers actually use.
Manual Payment Methods
- For some regions, bank transfers or cash on delivery (COD) are still standard.
- Bank transfers reassure local buyers who prefer direct payments.
- COD can win trust in markets where customers hesitate to pay upfront online.
- Shopify lets you add these under Manual Payment Methods so local shoppers feel included.
Step 6: Test your checkout (Shopify Payments Test Mode)
Go to Settings → Payments → Shopify Payments → Manage → Test mode (or use the Bogus Gateway for non-live testing)
![Shopify for Beginners: How to Accept International Payments in Shopify in [year]](https://www.doola.com/wp-content/uploads/2025/09/image-41-1080x547.png "Shopify for Beginners: How to Accept International Payments in Shopify in [year]")
In payment providers, select the Manage button on the top-right corner of the Shopify Payments section as shown in the screenshot below.
![Shopify for Beginners: How to Accept International Payments in Shopify in [year]](https://www.doola.com/wp-content/uploads/2025/09/image-42.png "Shopify for Beginners: How to Accept International Payments in Shopify in [year]")
Now scroll down and enable the Test mode by checking the box and hit the Save button.
![Shopify for Beginners: How to Accept International Payments in Shopify in [year]](https://www.doola.com/wp-content/uploads/2025/09/image-43-1080x606.png "Shopify for Beginners: How to Accept International Payments in Shopify in [year]")
What should you test?
- Card flows: Successful payment, failed payment, and 3D Secure challenge.
- Wallets: Apple Pay/Google Pay from supported devices/browsers.
- Local methods: If you enabled SEPA/UPI/PIX (via Stripe/regional gateways), run a real low-value test or QA with sandbox where offered.
- Currencies: Use a VPN or Markets preview to simulate browsing from each market and verify prices, shipping, and taxes.
- Refunds & partial captures: Process a refund and a partial capture to ensure your ops team is comfy with real-world scenarios.
💡 Pro tip: Place at least three end-to-end test orders (low, average, high ticket). Validate emails, invoices, tax lines, and the statement descriptor.
Real-World Example: Placing a Test Order with Shopify Payments
![Shopify for Beginners: How to Accept International Payments in Shopify in [year]](https://www.doola.com/wp-content/uploads/2025/09/image-44.jpg "Shopify for Beginners: How to Accept International Payments in Shopify in [year]")
Preview Your Store Like a Customer: Visit your storefront, browse as a shopper would, add products to your cart, and walk through the checkout process step by step.
Enter Test Payment Details: At checkout, don’t use your real card. Shopify gives you test numbers to simulate payments.
✅ Successful payment: Use 4949 4949 4949 4949
❌ Declined payment: Use 4000 0000 0000 0009
For the expiration date, enter any future date, and for CVV, any 3-digit number will work.
![Shopify for Beginners: How to Accept International Payments in Shopify in [year]](https://www.doola.com/wp-content/uploads/2025/09/image-44.png "Shopify for Beginners: How to Accept International Payments in Shopify in [year]")
Finish the Checkout: Complete the checkout process just like a real customer. Once done, you’ll land on a confirmation page, and the order will appear in your Shopify admin, marked as a “test transaction”.
![Shopify for Beginners: How to Accept International Payments in Shopify in [year]](https://www.doola.com/wp-content/uploads/2025/09/image-45.png "Shopify for Beginners: How to Accept International Payments in Shopify in [year]")
Check Your Admin: Head to the Orders tab in your Shopify admin to find your test order. Review every detail: how taxes were applied, shipping was calculated, and inventory was updated, so you can see exactly what your customers will experience in a real sale.
![Shopify for Beginners: How to Accept International Payments in Shopify in [year]](https://www.doola.com/wp-content/uploads/2025/09/image-46.png "Shopify for Beginners: How to Accept International Payments in Shopify in [year]")
When you’re confident everything works, head back to Settings > Payments and switch off Test Mode. You can now start collecting real payments from customers.
Step 7: Enable Fraud Protection & Risk Controls
Fraud happens more often than most new store owners think, and one bad chargeback can cost you money, time, and even your account.
But don’t panic, Shopify (and your payment gateways) give you plenty of tools to fight back.
Adjust Your Shopify Fraud Settings
- Go to Shopify Payments → Manage → Fraud Settings.
- Here you’ll find built-in tools that automatically scan for suspicious transactions.
Use Gateway-Specific Tools (Stripe, PayPal, etc.)
- Platforms like Stripe Radar and PayPal Risk Controls let you set rules such as blocking mismatched billing/shipping addresses or flagging unusual order patterns.
- You can customize these tools to fit your business, keeping genuine buyers happy while filtering out the bad actors.
Strengthen Your Checkout Security
- In Settings → Checkout, enable tools like CAPTCHA to stop bots from card-testing attacks.
- For extra protection, make sure your account itself is secure by enabling two-factor authentication (2FA) as shown in the screenshot below.
![Shopify for Beginners: How to Accept International Payments in Shopify in [year]](https://www.doola.com/wp-content/uploads/2025/09/image-47-1080x492.png "Shopify for Beginners: How to Accept International Payments in Shopify in [year]")
What to always enable
- 3D Secure / Strong Customer Authentication (SCA): Mandatory in the EU/UK, but good practice everywhere. It adds a layer of bank-level identity checks at checkout.
- AVS (Address Verification System) & CVV checks: These confirm the billing address and security code match the card, reducing fraud.
- Velocity limits: Block multiple rapid-fire transactions from the same card or IP; classic fraud behavior.
- IP/Country mismatch rules: Flag or block if someone in one country uses a card issued elsewhere without reason.
Add a Manual Review Step for High-Value Orders
If someone orders $1,000 worth of goods, pause before fulfilling. Check details like the buyer’s email domain, address, and past history.
Even a quick verification email can save you from a costly dispute.
Policies Are Your First Line of Defense
Clear shipping, return, and refund policies displayed on checkout pages and in customer emails help you win disputes.
If a customer tries to file a chargeback, your written policies serve as evidence.
| ⚡ doola Tip: Sync Your Shipping With Payment Capture Wait until you have a successful payment authorization before shipping products. Then, provide tracking numbers immediately after fulfillment. This simple step often decides whether you win or lose a chargeback claim. |
Step 8: Make Pricing Transparent – Duties & Taxes At Checkout
Go to Settings → Markets → (Select Market) → Duties & import taxes / Tax settings
Products → (Open product) → Customs information (HS code, country of origin)
What to set up?
- Collect duties & import taxes at checkout (where available) so buyers see the true landed cost and there are no surprise fees upon delivery.
- Register your tax IDs (EU VAT numbers, UK VAT, AU/NZ GST, US state registrations) so Shopify can apply the right rules.
- Tax-inclusive pricing for regions like the EU/UK to meet local norms.
- HS codes & origin on products to calculate duties accurately.
- Shipping profiles that support DDP (Delivered Duty Paid) if your carrier/workflow allows.
⚡ doola Tip: If you’ve configured flat rates in Shopify, add a short “All taxes/duties shown at checkout” note on product pages and the cart as shown in the image below.
![Shopify for Beginners: How to Accept International Payments in Shopify in [year]](https://www.doola.com/wp-content/uploads/2025/09/image-48.png "Shopify for Beginners: How to Accept International Payments in Shopify in [year]")
Real-World Example: How Shopify Calculates Import Duties at Checkout
All your sales between the EU and the UK are duty-free only when the goods are proven to be of UK or EU origin under the post-Brexit bilateral trade agreement.
Now, the origin can only be formally validated with a Certificate of Origin.
If you don’t have this document, or if you forget to include it with your shipment, the duty-free benefit doesn’t apply.
On Shopify’s side, the platform relies on the product data you provide and your declared statement of origin. Based on that information, Shopify may treat the goods as UK-origin with a zero duty rate as shown below.
![Shopify for Beginners: How to Accept International Payments in Shopify in [year]](https://www.doola.com/wp-content/uploads/2025/09/image-49.png "Shopify for Beginners: How to Accept International Payments in Shopify in [year]")
But in reality, customs could rule differently if no certificate is presented. In this case, the couriers will also go by paperwork. So without a Certificate of Origin, no preference will apply.
![Shopify for Beginners: How to Accept International Payments in Shopify in [year]](https://www.doola.com/wp-content/uploads/2025/09/image-50.png "Shopify for Beginners: How to Accept International Payments in Shopify in [year]")
Ultimately, for the same product you’ll end up with different duties and VAT amounts.
| Quick Go-live Checklist:
✔️ Shopify Payments active or third-party gateways connected ✔️ Markets created with currencies, rounding, and price adjustments set ✔️ At least one local method per key market (e.g., SEPA for EU, UPI for India) ✔️ Test orders completed (success, fail, 3DS, refund) ✔️ Fraud rules tuned and policies linked at checkout ✔️ Taxes/duties calculating correctly with HS codes and registrations in place |
Common Beginner Roadblocks (and How to Solve Them)
Even the most ambitious Shopify founders stumble when it comes to international payments.
Here are the most common mistakes, the real-world business impacts they cause, and practical solutions you can apply today:
🚫 Shopify Payments Isn’t Available in My Country
Many beginners assume Shopify Payments is universally available, only to discover their home country isn’t supported.
Without Shopify Payments, your checkout flow feels clunky. Customers face friction, trust dips, and abandoned carts pile up. Worse, you’re left juggling multiple third-party processors.
Solution: Use Payoneer, Stripe, PayPal, or a Merchant of Record (MoR) platform like Paddle. These options still let you sell globally, and MoR platforms even handle VAT/GST compliance on your behalf.
🚫 Currency Conversion Fees Are Eating Into Profits
Accepting payments directly into one account and letting banks automatically convert currencies.
Each conversion quietly chips away at margins, sometimes costing you 3–5% of every sale. For high-volume sellers, that’s a massive revenue leak.
Solution: Use Wise or Payoneer to create multi-currency accounts. Hold balances in local currencies and convert strategically at lower rates. This way, you keep more of what you earn.
🚫 High Chargeback Rates
Rushing into international sales without fraud protection or clear policies.
Chargebacks not only drain revenue but also damage your payment processor reputation. Too many, and you risk frozen funds or outright account termination.
Solution: Protect yourself with Shopify’s fraud filters and 3D Secure authentication. Pair this with crystal-clear refund, shipping, and return policies. Transparency reduces disputes, and 3D Secure shifts liability away from you.
🚫 Tax Compliance Feels Impossible
Ignoring tax responsibilities until it’s too late: VAT in Europe, GST in Asia-Pacific, or US sales taxes.
Sudden audits, penalties, or even being blocked from selling in key regions. Customers also lose trust if duties or VAT aren’t calculated upfront.
Solution: Start simple with Shopify Markets, which automatically calculates duties and VAT at checkout. If you want a completely hands-off approach, go with a Merchant of Record platform that collects and remits taxes for you.
🚫 No US Bank Account, So I Can’t Use Shopify Payments
Believing international founders are locked out of Shopify Payments because they lack a US account.
Without Shopify Payments, you miss out on lower fees, higher trust, and smoother checkout experiences. It also limits your ability to expand in the U.S.
Solution: Set up a US entity, EIN, and bank account. This unlocks Shopify Payments and global growth opportunities. doola can handle this entire setup for you: formation, tax ID, and banking, so you can focus on scaling your store.
Compliance & Legal Considerations for Selling Internationally
Expanding your Shopify store beyond borders is exciting, but global growth also brings global rules. Many new sellers jump straight into marketing and payment gateways, only to discover that compliance is not optional.
Here’s what many beginners overlook:
You May Need a Legal Entity to Unlock Shopify Payments
Shopify Payments isn’t available to everyone by default.
In many cases, you’ll need a US-based LLC or C-Corp (with an EIN and a business bank account) to get access. Without one, you’re stuck with third-party processors, which can mean higher fees and fewer options for scaling.
Why it matters: If your home country isn’t supported, a US entity is essential for smoother checkouts, investor confidence, and even credit-building opportunities for your business.
Taxes Aren’t Optional: Take Stock of Sales Tax, VAT, GST
- United States: Each state has its own sales tax rules, and selling to customers across states may trigger nexus (a tax obligation).
- European Union: VAT applies to both digital and physical goods, and rates vary by country. If you sell even a few items into the EU, compliance is mandatory.
- Asia-Pacific: Countries like Australia, India, and Singapore enforce GST/VAT-style taxes, which Shopify can help calculate but still requires you to register and remit.
Why it matters: Taxes directly affect checkout pricing, margins, and customer trust. Nothing kills a sale faster than surprise fees at delivery, or worse, penalties from tax authorities.
🚩 The Hidden Risk: Frozen Accounts
Payment processors like PayPal, Stripe, and even Shopify Payments have strict Know Your Customer (KYC) and Anti-Money Laundering (AML) rules.
If your business isn’t set up properly, they can freeze payouts overnight, locking away your revenue for weeks (or even permanently).
Let’s now find out how doola helps you account for these compliance and legal aspects.
Best Alternative Payment Gateways for International Shopify Stores
When Shopify Payments isn’t an option, you don’t have to halt your global ambitions. There’s a whole lineup of trusted payment gateways that can keep your store running smoothly while letting customers pay in their local currencies.
Let’s break them down one by one:
1. PayPal: The Global Standard
Best For: Beginners who want global coverage with minimal setup.
With over 400 million active accounts, PayPal remains the most trusted digital wallet worldwide. If you want instant credibility at checkout, PayPal is almost non-negotiable.
Pricing: Transaction fees typically range between 2.9% + $0.30 (domestic) to 4.4% + fixed fee (international).
Key Features:
- Instant customer trust with PayPal’s brand recognition
- Buyer and seller protection policies
- Multi-currency acceptance
- Integrated with Shopify in a few clicks
- Works in 200+ countries
- Supports 25+ currencies
✅ Pros:
- Widely trusted by buyers worldwide
- Easy integration with Shopify
- Fast payout options in many countries
🚩 Cons:
- Higher fees compared to other gateways
- Risk of frozen accounts if disputes arise
2. Wise: Multi-Currency Options
Best For: Sellers dealing with customers in multiple currencies
Wise specializes in low-cost cross-border payments and multi-currency accounts. For Shopify sellers, it’s a powerful tool to keep profits from vanishing due to currency conversion fees.
Key Features:
- Hold and manage balances in 40+ currencies.
- Mid-market exchange rates with transparent fees.
- Direct Shopify payouts in supported regions.
Pricing:
- Currency conversion: ~0.5% to 1%.
- No hidden bank markup fees.
✅ Pros:
- Lowest conversion costs in the industry.
- Great for protecting international profit margins.
- Easy withdrawals into local accounts.
🚩 Cons:
- Not a full-fledged payment gateway (more of a money management tool).
- Limited customer-facing features compared to Stripe or PayPal.
3. Payoneer: Cross-Border Payouts
Best For: Non-US founders who need a reliable way to withdraw Shopify sales revenue worldwide.
Payoneer is a powerful platform for freelancers and entrepreneurs, especially those outside the US, to withdraw international earnings with ease.
Key Features:
- Receive payments in 150+ currencies
- Local receiving accounts in USD, EUR, GBP, JPY, and more
- Direct withdrawals to your local bank
- Debit card option for instant access
Pricing:
- Transaction fees around 2%–3% above market exchange rates
- Free Payoneer-to-Payoneer transfers
✅ Pros:
- Global reach with flexible payout options
- Works well for marketplaces like Amazon, Fiverr, Upwork, and Shopify
- Provides a business debit card for easy withdrawals
🚩 Cons:
- Customer support can be slow
- Fees are lower than PayPal but higher than Wise
4. Stripe: Maximum Currencies & Customizations
Best For: Founders who want flexibility and advanced features
Stripe is one of the most advanced payment processors available, offering deep customization, fraud protection, and support for 135+ currencies.
Key Features:
- 135+ currencies supported
- Wide payment method coverage (cards, wallets, local methods)
- Built-in fraud detection and reporting
Pricing:
- Transaction fees: ~2.9% + $0.30
- Currency conversion: ~2%
✅ Pros:
- Highly reliable
- Great customization options
- Seamless Shopify integration
🚩 Cons:
- Not available in every country
- More complex setup compared to PayPal
5. Merchant of Record (MoR) Models: Paddle & Lemon Squeezy
Best For: Digital product sellers (software, courses, subscriptions).
Merchant of Record platforms act as intermediaries. They handle not just payments but also VAT, GST, and compliance headaches on your behalf.
Key Features:
- Full tax compliance outsourcing
- Invoicing and remittance handled automatically
- No separate VAT/GST registrations needed
Pricing: Typically 5–10% of transaction value.
✅ Pros:
- Hands-off compliance solution
- Peace of mind for global tax obligations
- Great for digital-first businesses
🚩 Cons:
- Higher fees compared to standard gateways
- Less flexibility for physical goods sellers
6. Regional Options: Razorpay (India) & Klarna (EU)
When global gateways don’t cover local needs, regional solutions step in. Razorpay dominates India’s digital payments scene, while Klarna is a giant in the EU for buy-now-pay-later.
Best For:
- Founders targeting specific regional markets
- Sellers looking to offer locally preferred payment methods
Key Features (Razorpay):
- UPI, net banking, wallets, and cards in India
- INR + international card support
Key Features (Klarna):
- Buy-now-pay-later financing
- Local European payment methods
- Strong brand recognition in the EU
Pricing:
- Razorpay: ~2–3% per transaction.
- Klarna: Merchant fees vary (higher for BNPL).
✅ Pros:
- High trust in their home markets
- Local payment method coverage
- Easy customer adoption
🚩 Cons:
- Limited global reach
- Fees can be higher for certain payment types
Summary: Shopify Payment Alternatives
Gateway
Availability
Currencies
Payout Speed
Beginner-Friendly
Fees
Shopify Payments
20+ countries
130+
2-3 days
✅
Low
PayPal
200+ countries
25+
Instant–5days
✅
Medium-High
Wise
70+ countries
40+
1-2 days
✅
Low
Payoneer
190+ countries
150+
1-3 days
✅
Low-Medium
Stripe
45+ countries
135+
2-7 days
✅
Medium
Razorpay
India only
INR, USD
2-5 days
✅
Low
How doola Helps Shopify Sellers Go Global
Instead of grappling with compliance headaches on your own, doola gives you the full toolkit to stay legitimate and scale with confidence:
- LLC or C-Corp formation in the US: Unlock Shopify Payments and give your business a global foundation.
- EIN (tax ID) filing: Essential for tax compliance and required by most payment gateways.
- US bank account setup: Get paid like a local business, even if you’re based overseas.
- Ongoing compliance support: From annual filings to bookkeeping, doola keeps your entity in good standing year after year.
With doola’s services, you’re not just accessing a payment gateway, you’re building the infrastructure that keeps your store compliant, scalable, and investor-ready.
🔖 Related Read: Best E-Commerce Books to Build, Grow, and Scale Your Online Business
Simplify Shopify International Payments With doola

If payments are blocked in your region, or VAT and banking compliance feel overwhelming, you don’t have to give up on global customers.
With doola, you can easily form your US company, get an EIN and US bank account, unlock Shopify Payments eligibility, and stay compliant with tax and reporting rules stress-free.
Book a demo with doola and start accepting international payments on Shopify the right way.
FAQs

Do I need a US company to accept international payments in Shopify?
You don’t always need a US company to accept international payments in Shopify, but it’s required if you want Shopify Payments in countries not directly supported.
What’s the difference between Shopify Payments & third-party gateways?
Shopify Payments is built-in with lower friction; third-party gateways (PayPal, Stripe, etc.) can be used if Shopify Payments isn’t available.
How do I avoid high fees when receiving international payments?
Use Wise or Payoneer to hold funds in multiple currencies and withdraw at better rates.
Which countries can’t use Shopify Payments, and what’s the alternative?
Countries like India, most of Africa, and parts of Asia are excluded. Alternatives: Payoneer, PayPal, Stripe, Razorpay.
How do taxes (VAT, GST, sales tax) work for Shopify international sellers?
Shopify Markets auto-calculates many taxes, but you may still need a registered entity or MoR platform to stay compliant.
Can I sell globally on Shopify without a US bank account?
Yes, with PayPal/Payoneer. But for Shopify Payments, a US account is often required.
How does doola help Shopify sellers with formation and compliance?
doola sets up your LLC, EIN, and US bank account, so you can access Shopify Payments and stay compliant worldwide.
![Shopify for Beginners: How to Accept International Payments in Shopify in [year]](https://doolastaging.wpengine.com/wp-content/uploads/2024/12/black-butotn.png "Shopify for Beginners: How to Accept International Payments in Shopify in [year]")
Table of Contents
What Does “Accepting International Payments” in Shopify Actually Mean?Shopify’s Built-In Tools for International PaymentsStep-by-Step: How to Accept International Payments in ShopifyCommon Beginner Roadblocks (and How to Solve Them)Compliance & Legal Considerations for Selling InternationallyBest Alternative Payment Gateways for International Shopify StoresHow doola Helps Shopify Sellers Go GlobalSimplify Shopify International Payments With doolaFAQsStart Your Dream U.S. Business Today.
![Shopify for Beginners: How to Accept International Payments in Shopify in [year]](https://www.doola.com/wp-content/uploads/2025/05/5-sidebar.png "Shopify for Beginners: How to Accept International Payments in Shopify in [year]")
![Shopify for Beginners: How to Accept International Payments in Shopify in [year]](https://www.doola.com/wp-content/uploads/2025/06/construction-bottom.jpg "Shopify for Beginners: How to Accept International Payments in Shopify in [year]")

![Shopify for Beginners: How to Accept International Payments in Shopify in [year]](https://doolastaging2.wpenginepowered.com/wp-content/uploads/2025/11/pop-up-cta-1080x365.webp "Shopify for Beginners: How to Accept International Payments in Shopify in [year]")
![Shopify for Beginners: How to Accept International Payments in Shopify in [year]](https://doolastaging2.wpenginepowered.com/wp-content/uploads/2025/11/pop-up-cta-mobile.webp "Shopify for Beginners: How to Accept International Payments in Shopify in [year]")