Language:
How to Record Transactions for Bookkeeping
Managing your transactions effectively is critical for keeping your books accurate and ensuring your business runs smoothly.
doola simplifies this process with user-friendly tools and automation features.
In this guide, we’ll show you how to record transactions for bookkeeping with doola. From viewing and filtering transactions to auto-tagging, manually adding entries, and uploading receipts—we’ve got you covered.
We’ll also dive into editing and exporting transactions so your records stay accurate and up-to-date. By the end, you’ll know exactly how to make the most out of doola Bookkeeping and take the stress out of managing your finances.
Ready? Let’s get started.
Step 1: Access the Transactions Tab
From your doola dashboard, locate the “Transactions” tab in the top menu and click on it.

This is your central hub for viewing, managing, and recording all your financial activity. It consolidates data from connected bank accounts, payment processors, and manually added entries, giving you a comprehensive overview of your business finances.
Step 2: Connect All Relevant Accounts
Ensure your bank accounts and payment processors are connected:
✅ Use Plaid (recommended for instant and secure integration).
✅ Add accounts manually if Plaid isn’t supported.
✅ Go to the Settings tab, select Manage Accounts, and connect any missing accounts.

Without connected accounts, transactions won’t populate in the system. So, make sure your accounts are connected.
This step ensures every transaction — whether from bank accounts, Stripe, Shopify, or other sources is tracked automatically, saving you time and reducing errors.
Please note: If your accounts aren’t connected yet, toggle on demo data in the Transactions tab to familiarize yourself with the interface.
Step 3: View and Understand Transactions
In the Transactions tab:
- Review all transactions categorized as income (positive) or expenses (negative) with color coding for easy identification.

- Hover over any transaction to see quick details like amount, date, and account.
This view provides an organized snapshot of your business’s financial activity, helping you quickly identify income sources, expenses, and trends.
Step 4: Filter Transactions
Use the search bar or the Filter button to refine your transaction list.
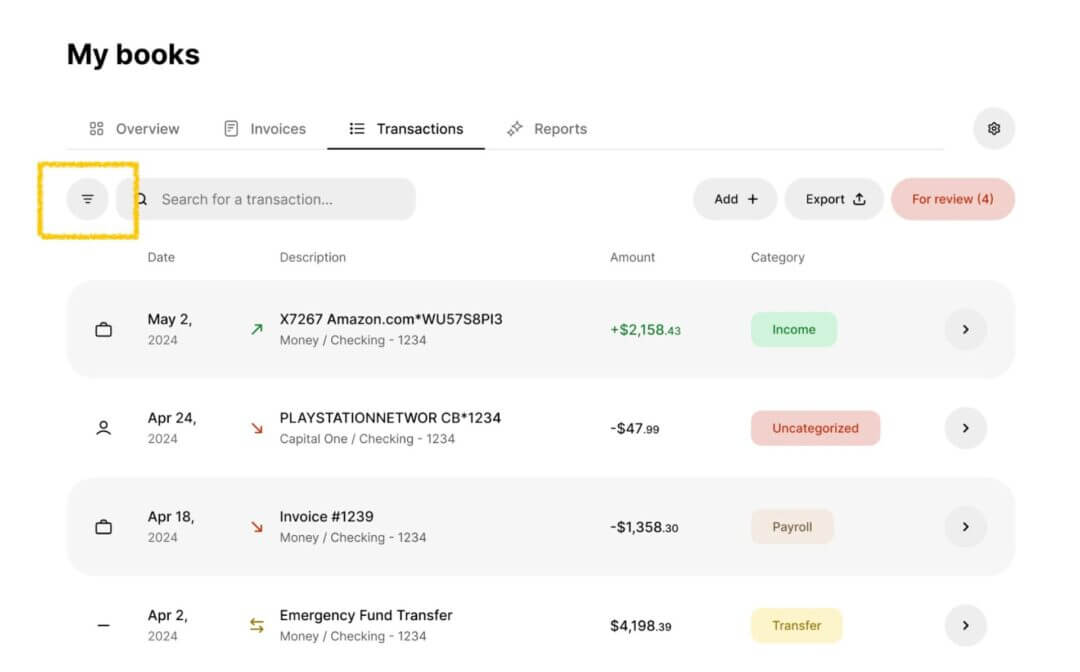
You can filter by:
- Account type (e.g., checking, savings)
- Amount thresholds (e.g., transactions over $500)
- Date range
- Transactions with or without receipts
Step 5: Review and Categorize Transactions
Here’s what you have to do in this critical step:
✅ Click on any transaction to open its detailed view.
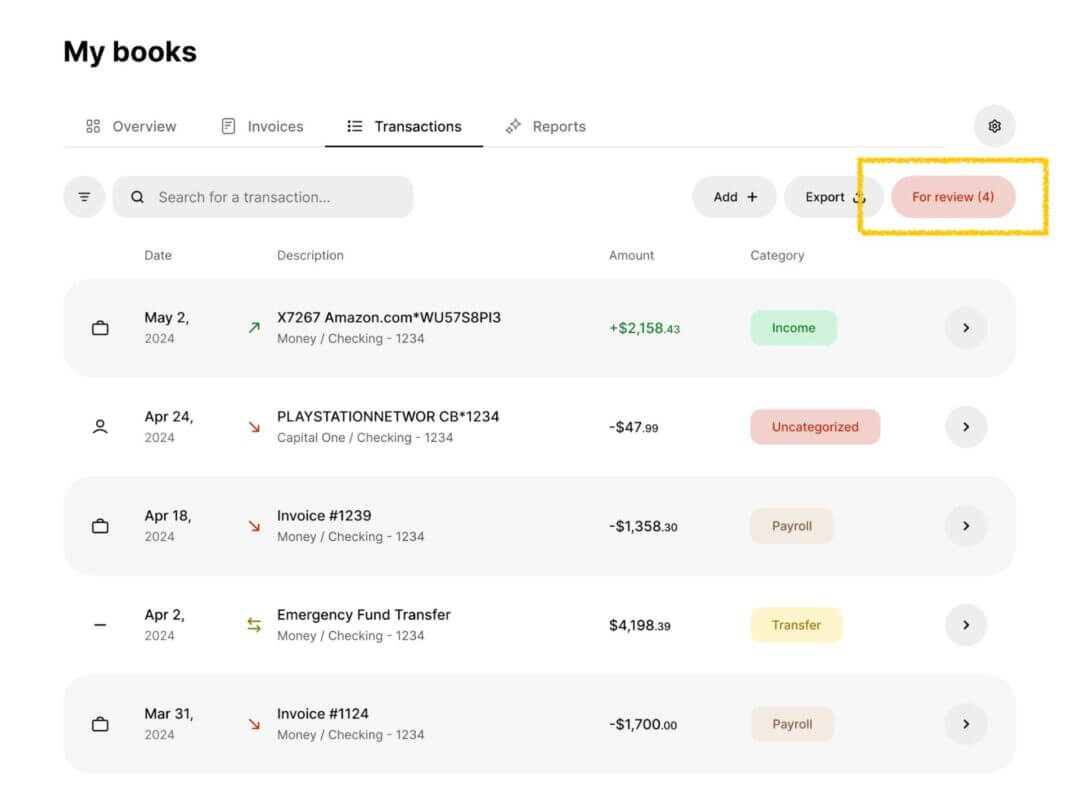
✅ Assign categories (e.g., payroll, utilities, or revenue).
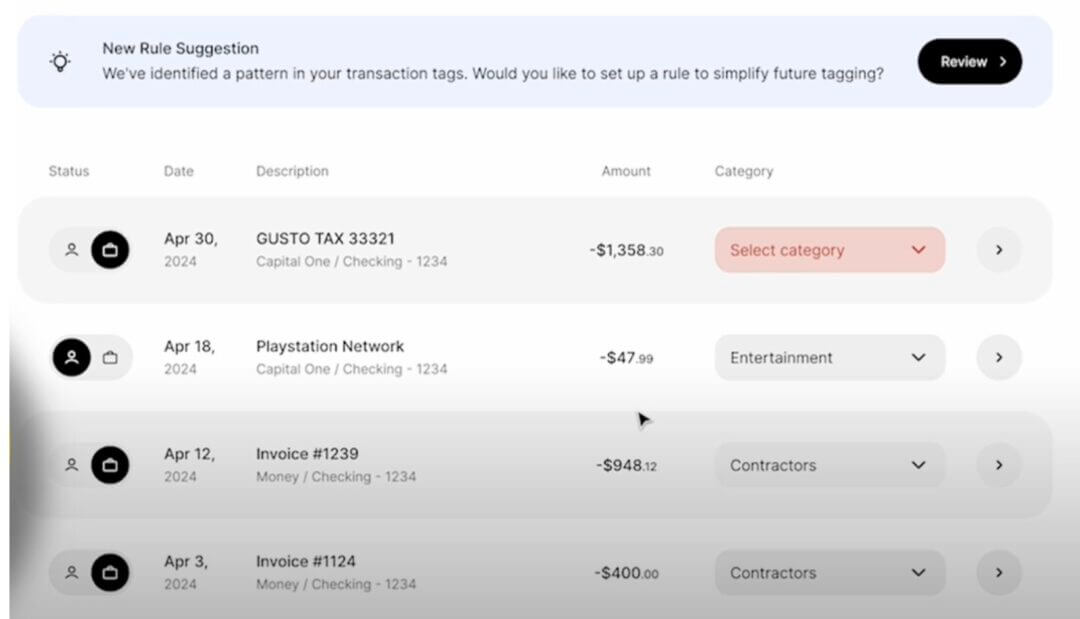
✅ Next, add notes or attribute the transaction to a specific client.
✅ Use the Review Transactions button (in red) for flagged or uncategorized items.
Please note: Once a category is assigned, doola will remember your selection and patterns and auto-tag similar transactions in the future.
Step 6: Set Up Auto-Tagging Rules
Auto-tagging saves time by automating categorization for recurring transactions, ensuring consistency and reducing manual work. Here’s what you need to do in this step:
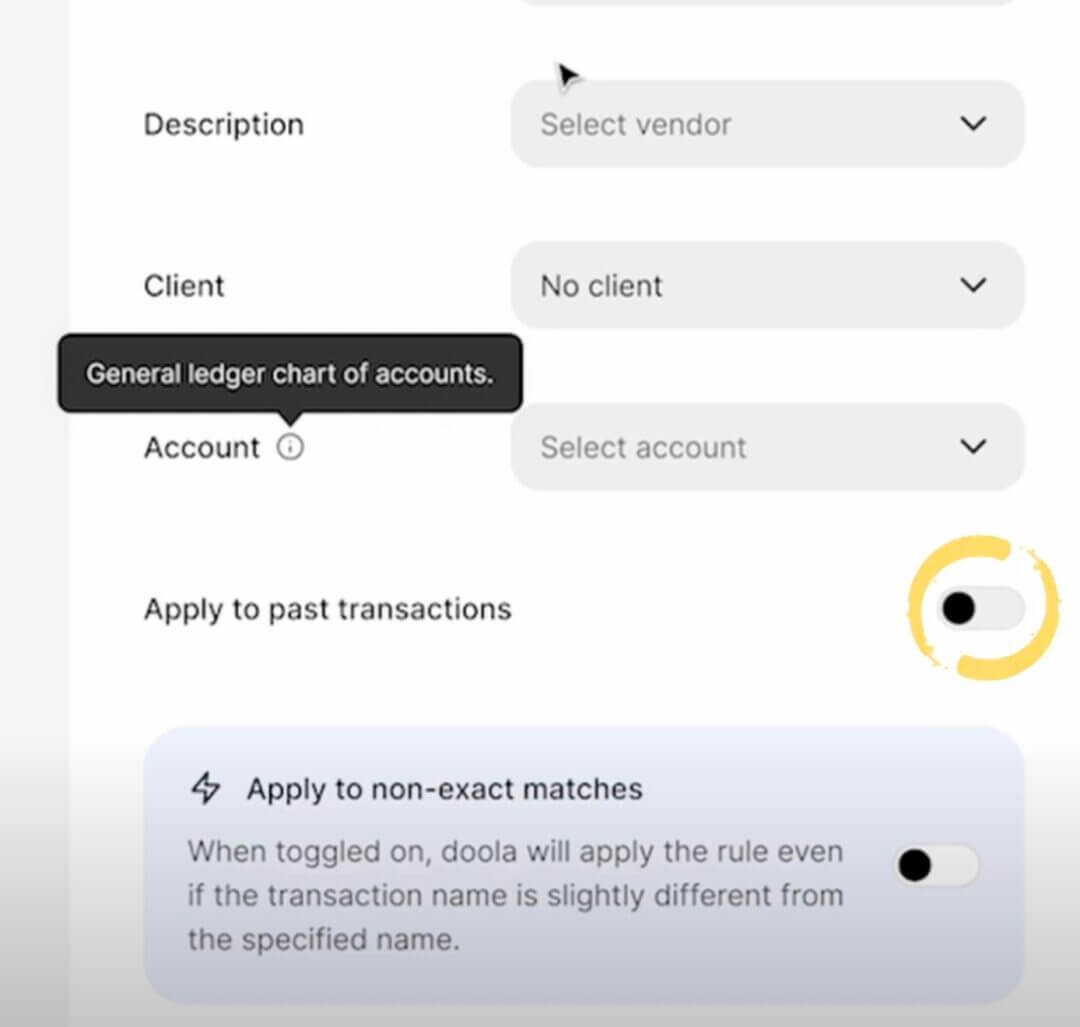
✅ Click Add Rule in the Transactions tab.

✅ Define parameters for a rule (e.g., transaction name, description, client, category).

✅ Toggle on options to backfill the rule for past transactions or match names with slight variations.
Step 7: Manually Add Transactions
For transactions that aren’t automatically tracked (e.g., cash payments or Venmo transfers), here’s what you need to do:
✅ Click the Add button.

✅ Select whether it’s income, expense, or transfer.

✅ Enter details like date, amount, description, account, category, and client.
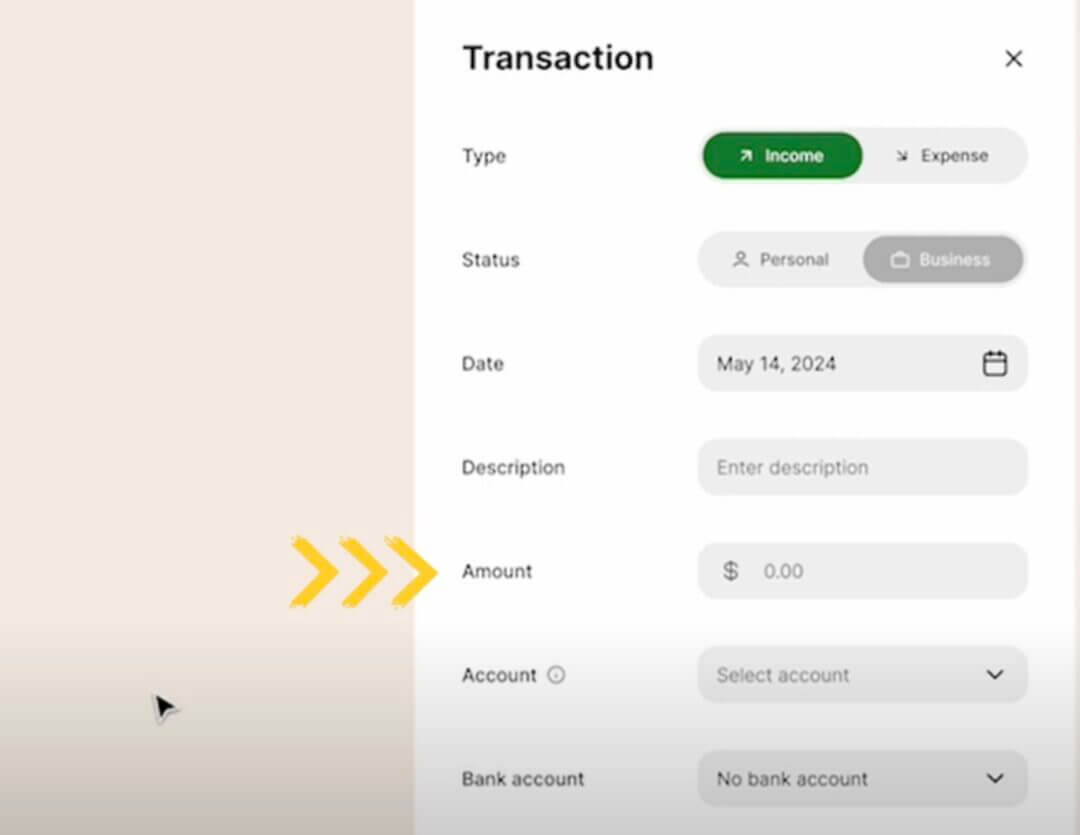
✅ Upload receipts if applicable.
Follow the same steps if your transaction is an “Expense”.

Why This Step Matters:
Manually adding transactions ensures your records are complete, covering payments that automated systems can’t track.

Step 8: Upload and Attach Receipts
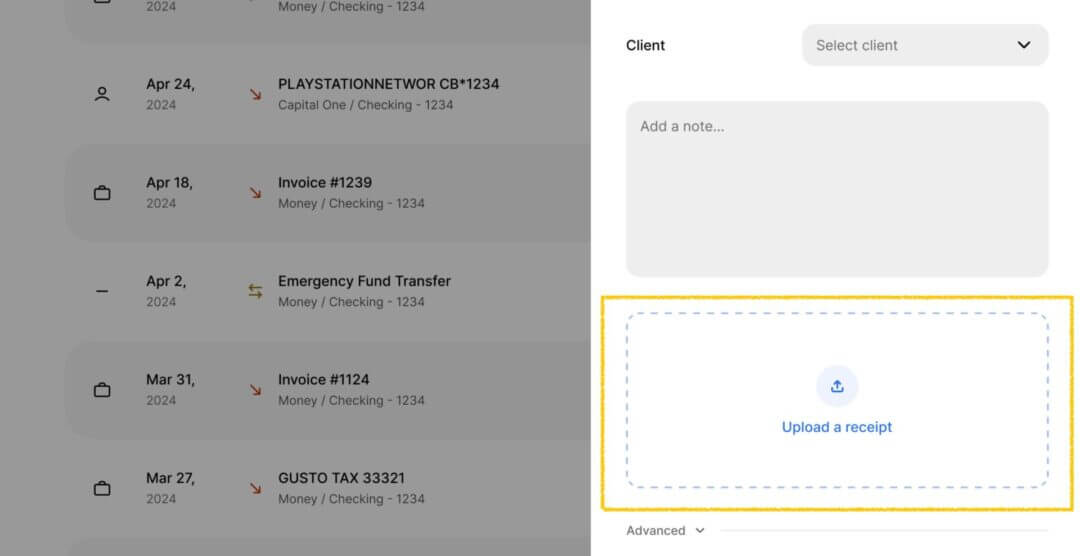
While uploading a receipt for a transaction, you can also edit its details to ensure proper categorization of the transaction type (e.g., income, expense, or transfer) and assign it to the correct category (e.g., payroll, utilities, or revenue).
Additionally, you can add notes for context, attach the transaction to an existing client (or create a new one), and link it to the appropriate account.
What you’ll do here:
✅ Open a transaction and click Upload Receipt.

✅ Attach the file directly to the transaction.
Step 9: Edit Transactions as Needed
For any transaction, you can:
- Edit the category or client.
- Add or update notes.
- Convert income/expenses into transfers (e.g., moving funds between accounts).
Why This Step Matters:
Editing ensures your records reflect the actual flow of funds, correcting errors or reclassifying transactions to maintain accuracy.
Step 10: Export Transactions
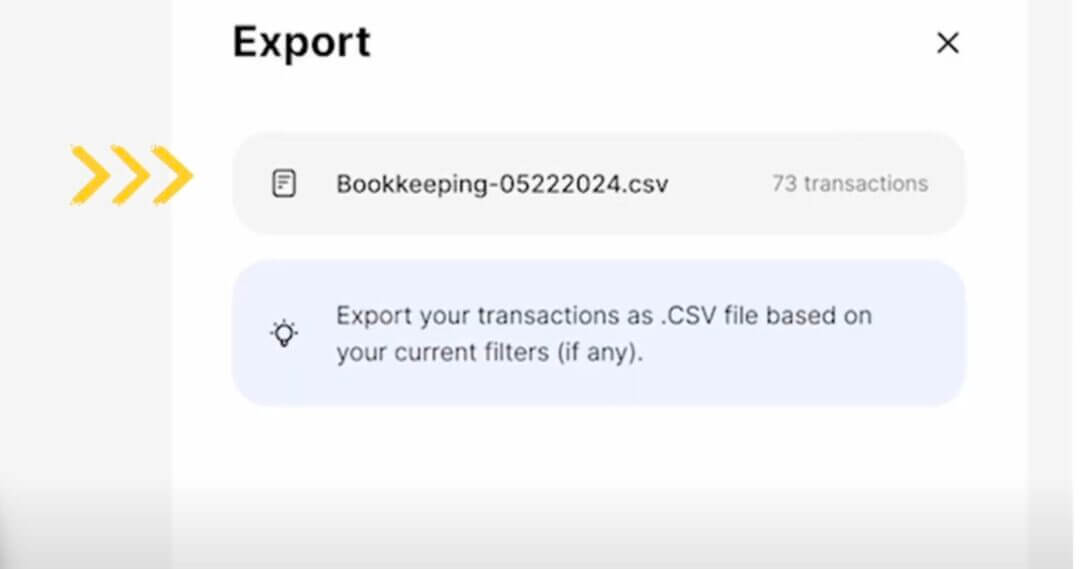
Before wrapping up your transaction management, there may be times when you need to analyze your financial data outside the platform or share it with others, like your accountant or business partners. Thankfully, doola makes exporting transactions simple and straightforward.
Here’s what you need to do:
✅ Click the Export button.

✅ Choose whether to export all transactions or a filtered subset.
✅ Download the data as a CSV file.
Step 11: Use a Dedicated Bookkeeper (Optional)
As a business owner, your time is your most valuable asset. While doola makes bookkeeping simple, some tasks — like reviewing and categorizing transactions — can still feel time-consuming, especially as your business grows. That’s where a dedicated bookkeeper can step in to take the weight off your shoulders.
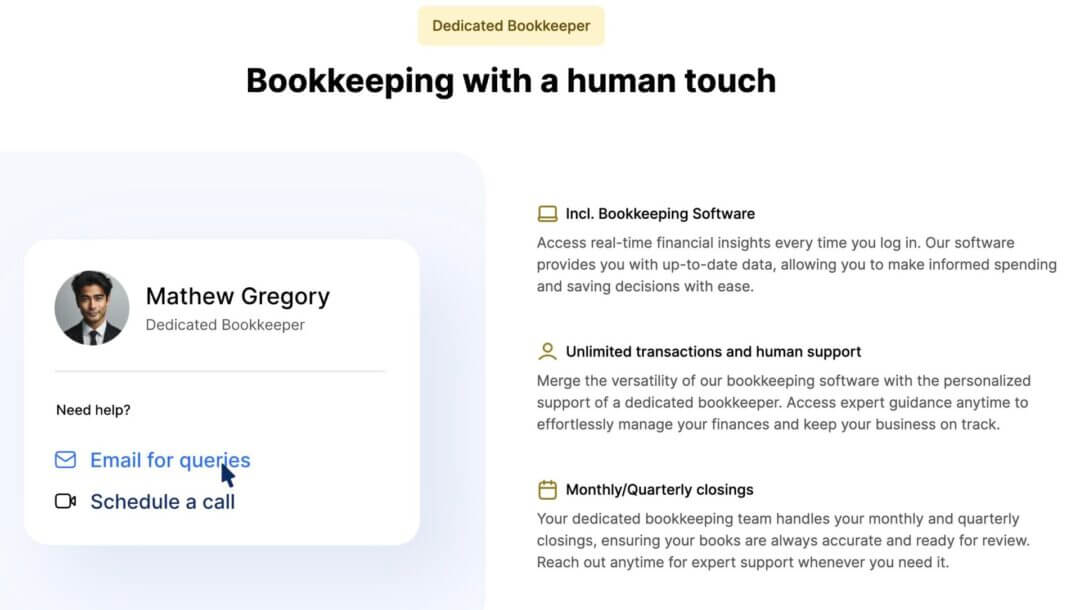
If managing transactions feels overwhelming, upgrade to the dedicated bookkeeper plan. Your bookkeeper will:
- Handle categorization and reviews.
- Assist with setup and provide expert insights.
Need More Help? Let’s doola It!

Now that you’ve explored how doola makes bookkeeping effortless, why not dive deeper into the world of financial management?
Our doola team is always available for consultations or demos to guide you through the process.
Sign up for a demo and let doola take care of your bookkeeping tasks.


