How to Accept International Payments from India: A Complete Guide for Entrepreneurs & Businesses

India is projected to contribute over $200 billion annually to cross-border payments by 2027, fueled by booming sectors like e-commerce exports, SaaS, and professional consulting.
But the path isn’t straightforward. Indian entrepreneurs face real barriers, which can slow down businesses that are otherwise ready to scale globally.
There’s limited access to global gateways, high forex conversion charges, complex compliance under FEMA and GST, and client skepticism about sending money overseas.
If you’re a freelancer, startup founder, or scaling e-commerce brand, this guide will equip you with the clarity and steps you need to accept international payments and grow worldwide.
We’ll break down how to accept international payments from India, how compliance works, what documents you need, and why incorporating in the U.S. can unlock a new level of credibility and access to tools.
You’ll also learn how doola helps Indian entrepreneurs set up U.S. entities, banking, and payment gateways, making global expansion seamless and sustainable.
Let’s start!
Understanding International Payments in India
For Indian entrepreneurs and freelancers, the term “international payments” can mean different things depending on the context. Broadly, cross-border inflows into India fall into two categories:
✔️ Remittances
Money sent by friends, family, or individuals abroad for personal reasons. These are governed by the RBI’s Liberalized Remittance Scheme (LRS) and are not treated as business income.
✔️ Business Receipts
Payments received in exchange for goods, services, consulting, SaaS subscriptions, or e-commerce orders. These are considered export proceeds and fall under FEMA (Foreign Exchange Management Act) and GST (Goods & Services Tax) regulations.
However, there’s a big difference in how international payments flow depending on whether you’re acting as a freelancer (individual) or a registered business entity.
- Individual: You can receive funds through PayPal, Wise, or wire transfers into your savings account, but large inflows trigger compliance scrutiny. Without GST registration and FIRC, you may struggle to prove export income during tax filings.
- A Registered Business: You receive payments into a current account tied to your registered entity. You can generate GST-compliant invoices, claim export benefits, and get FIRCs issued in your company’s name. Plus, you can claim export incentives and input tax credits.
For entrepreneurs, only business receipts qualify as legitimate export income, which means you’ll need proper invoices, contracts, and documentation to stay on the right side of three major regulatory frameworks in India:
- Reserve Bank of India (RBI): Oversees all cross-border inflows and sets the rules for foreign exchange under FEMA. It controls how foreign currency comes into the country and ensures it’s converted into INR through proper banking channels.
- FEMA (Foreign Exchange Management Act): Defines how export proceeds must be received, reported, and converted into INR. It governs export proceeds like how quickly you must realize payments (usually within nine months) and the paperwork banks need.
- GST (Goods & Services Tax): Applies to exports of goods and services. While exports are “zero-rated,” meaning you can claim input tax credit or apply for refunds, you still need to raise GST-compliant invoices.
Together, these authorities ensure that every dollar, pound, or euro entering India is accounted for and taxed appropriately.
If you ignore their rules, banks can hold your funds, and you may face compliance notices or penalties later.
🔖 Related Read: The Ultimate Guide to Global Business Banking
How Forex Rates and Banking Processes Affect Earnings
When you receive international payments, the final amount in your bank isn’t just a direct conversion.
For example, When you bill a $1,000 invoice to a U.S. client, that doesn’t mean you’ll see ₹83,000 in your Indian bank account (assuming a $1 = ₹83 rate).
Here’s why the number shrinks:
- Conversion spread: Banks and gateways don’t give you the mid-market forex rate. They shave a margin (often 2–3%), so you already lose value during conversion.
- Gateway fees: Platforms like PayPal charge up to 4–5% on top of that, sometimes up to 4–5%, in addition to forex markups.
- Settlement delays: Depending on the method, it can take 2–7 days for funds to land in your account, locking up working capital.
- FIRC (Foreign Inward Remittance Certificate): To prove your payment was for exports, banks issue an FIRC. Without it, you can’t show regulators that your income was compliant.
So, from a $1,000 invoice, you may end up with only $930–$950 in hand.
Common Challenges for Indian Entrepreneurs
For Indian entrepreneurs the reality of receiving international payments often feels like swimming upstream.
From platform restrictions to compliance paperwork, there are several hurdles that can eat into margins and slow down growth.
1. Payment Gateway Access and Restrictions
Some of the world’s most trusted gateways aren’t fully available in India, or come with restrictions that make scaling difficult.
For instance, Stripe isn’t natively open to Indian businesses, while PayPal has limits on how long you can hold funds before withdrawal. Here’s a quick look:
| Gateway | Availability in India | Limitations |
| PayPal | Available | High fees, mandatory withdrawal to Indian bank within 24 hours, limited FIRC support |
| Stripe | Not directly available | Requires U.S. incorporation (via doola or similar), better access after entity setup |
| Wise | Available | Great for freelancers, but limited marketplace integrations |
| Payoneer | Available | Heavily tied to marketplaces (Amazon, Upwork, Fiverr); requires KYC and compliance reviews |
| Razorpay Int’l | Available (India-based) | Best for e-commerce, but limited to supported currencies and compliance-heavy |
| Bank Wire (SWIFT) | Available | Expensive fees, long settlement times, heavy paperwork for FIRC |
🔖 Related Read: How to Set Up Payment Gateways for Your Shopify Store in India: 2025 Guide
2. High Transaction Fees and Forex Losses
Even if you get paid, the amount you actually receive can be far less than what you invoiced. Multiply that across dozens of clients or larger invoices, and the loss is significant. Imagine this:
- A U.S. client pays you $1,000 via PayPal.
- PayPal charges 4.4% + a fixed fee ($44).
- Currency conversion adds another 2–3% spread (~$20–$30).
- After deductions, you might receive only $920–$930 in your Indian bank.
Platforms like Wise and Payoneer are cheaper but still take their cut, while bank wires involve flat fees of $20–$40 per transfer plus forex margins.
3. Limited Trust and Credibility with Global Clients
Many overseas clients are reluctant to send large payments to an individual’s savings account in India because of credibility or compliance concerns.
A client wiring $5,000 or $10,000 wants the security of paying a registered company with official invoices and bank accounts.
Without this structure, you may lose deals to competitors who look “more professional” even if your services are better.
4. Compliance Headaches: FEMA, GST, TDS, and Documentation
Finally, compliance adds a heavy layer of friction. FEMA rules require export proceeds to be realized within a fixed timeline (generally nine months).
GST compliance means you must raise zero-rated export invoices and maintain supporting records for refunds.
Also, some foreign clients deduct tax at their end (Tax Deducted at Source), leaving you with less than the full invoice value.
Banks often demand FIRCs and GST-compliant invoices for larger payments, and missing these can delay fund release.
Put together, these factors make international payments less about just “getting paid” and more about building systems that protect your revenue and keep regulators satisfied.
Best Ways to Accept International Payments from India
Indian entrepreneurs today have many options to collect cross-border payments but not all gateways are equal. Some are simple to set up but expensive, others are affordable but compliance-heavy.
Here is a side-by-side comparison to help you choose what fits your business best.
| Gateway | Fees (approx.) | Supported Countries | KYC Required | Speed (to Indian bank) | FIRC Support |
| PayPal | 4.4% + fixed fee + 2–3% forex | 200+ | Yes | 1–3 days (auto-withdraw in 24 hrs) | Limited |
| Stripe Atlas | 2.9% + 30¢ per transaction | 135+ | Yes (U.S. entity) | 2–7 days | Yes (via U.S. bank) |
| Wise | 0.6%–1.5% + mid-market FX | 70+ | Yes | 1–2 days | Yes |
| Payoneer | 2%–3% forex + marketplace fee | 150+ | Yes | 1–3 days | Yes |
| Razorpay Int’l | 3% + GST + forex spread | 100+ (currency support varies) | Yes | 2–5 days | Yes |
| Bank Wire (SWIFT) | $20–$40 per transfer + forex spread | Global | Yes | 2–7 days | Yes |
PayPal
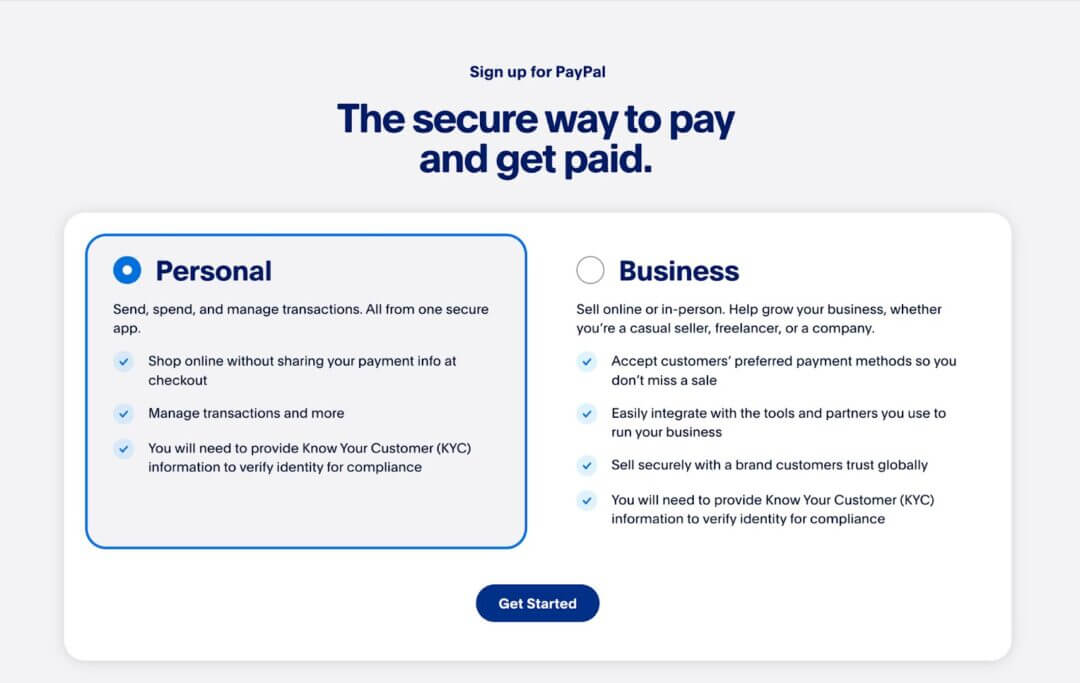
PayPal is the easiest way to start accepting international payments in India, but the fees are high and compliance (FIRC collection) requires extra steps.
It’s easy to set up and trusted globally, but it does come with higher fees and mandatory auto-withdrawals to your Indian bank account.
Here’s how to get started, step by step.
Step 1: Account Creation
- Go to PayPal India and click Sign Up.
- Choose Business Account (this is required for receiving export proceeds and issuing invoices).
- Enter your email address and set a password.
- Provide your business details, such as name, PAN, GSTIN (if registered), business type (sole proprietorship, private limited, etc.).
- Confirm your contact details and banking information to create the account.
Step 2: Business Verification
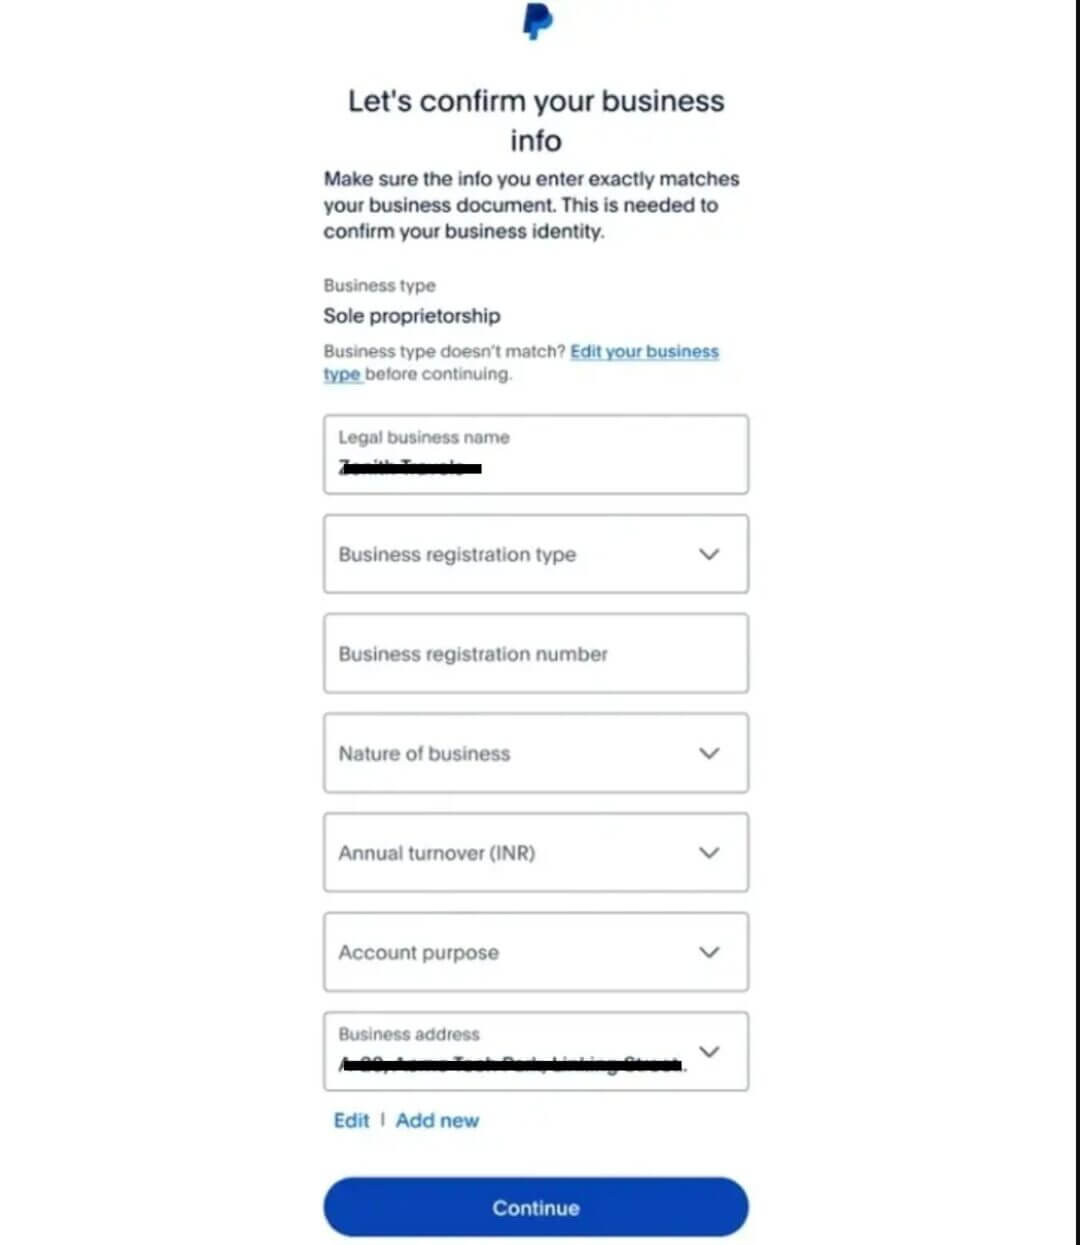
- Upload your PAN card (mandatory for all users).
- If you’re GST registered, upload your GST certificate.
- Provide a bank statement or utility bill for address proof.
- PayPal may also request additional documents for high-volume accounts, such as business registration certificates.
- Once verified, you can start receiving payments, but full verification ensures higher limits and fewer holds.
Step 3: Linking Your Indian Bank Account
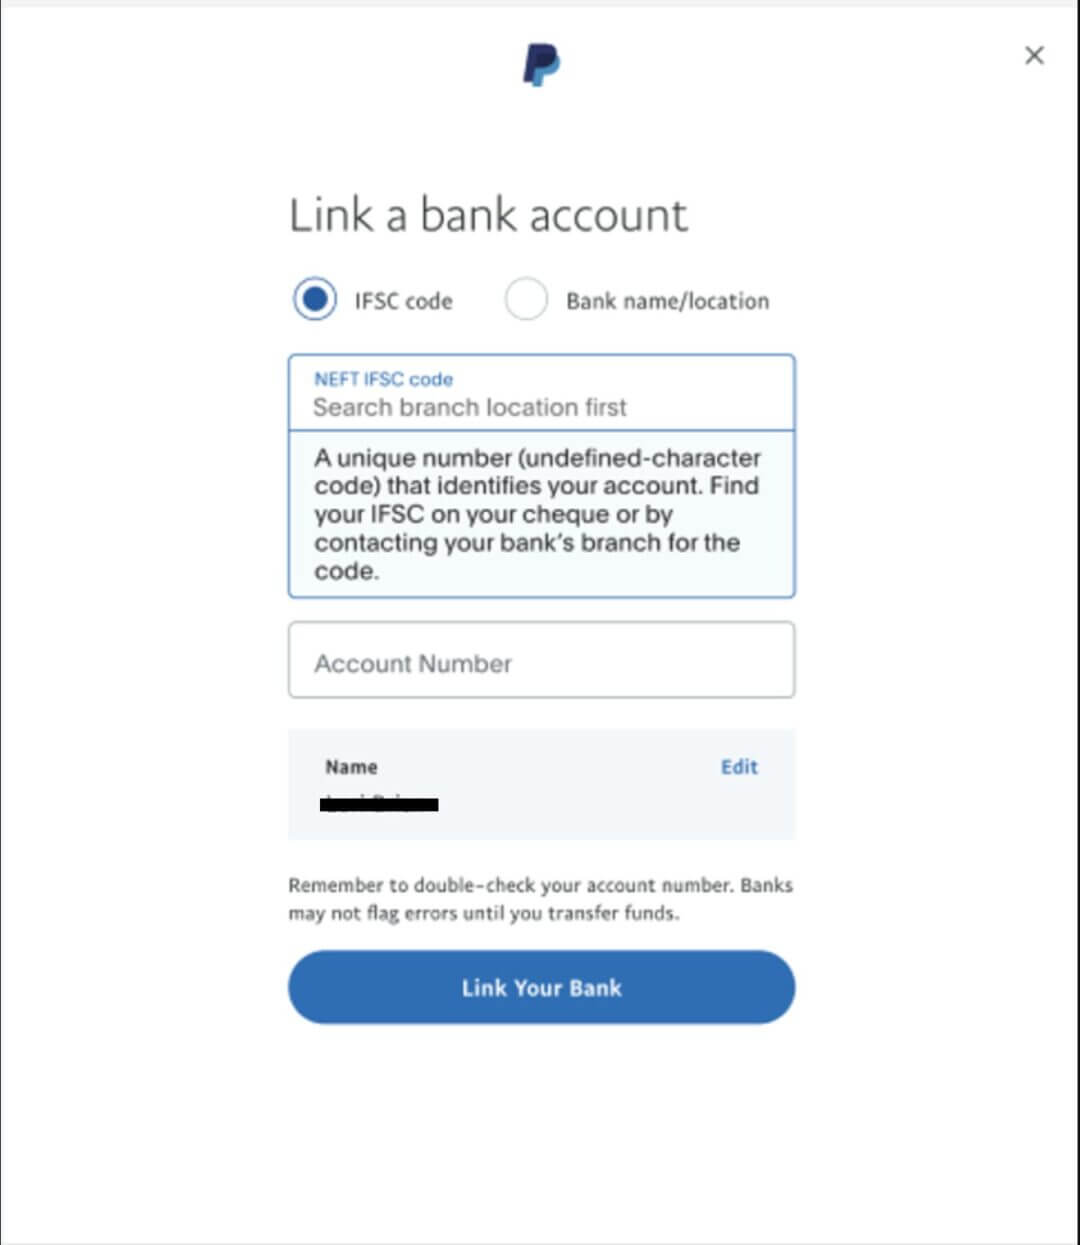
- Log in to your PayPal dashboard and go to Link a new bank account.
- Enter your bank account number, IFSC code, and bank name.
- PayPal will make two small deposits into your account within 2–3 business days.
- Verify the amounts inside PayPal to confirm your bank account.
- Once linked, PayPal will automatically transfer funds from your PayPal balance to your Indian account within 24 hours.
Step 4: Receiving Payments
- Create an invoice inside PayPal or share your PayPal business email ID with clients.
- Client pays using their PayPal account or credit card.
- PayPal deducts fees (~4.4% + fixed fee depending on currency) and applies its forex conversion spread.
- The remaining funds are auto-withdrawn to your linked Indian bank account within one business day.
Step 5: Extracting FIRC (Foreign Inward Remittance Certificate)
PayPal itself does not issue FIRCs. Instead, you need to request it from the bank where your funds land:
- After withdrawal, check your bank statement for the PayPal transfer.
- Contact your bank’s foreign exchange department and request an Inward Remittance Advice (IRA) or FIRC for that transaction.
- Provide transaction details (date, amount, UTR number).
- The bank issues an FIRC, which serves as proof that the funds are export proceeds.
- Keep these documents safe since they’re required for GST compliance, export benefits, and audits.
Stripe Atlas / Stripe India Workarounds

One of the world’s most popular payment gateways, Stripe isn’t fully available in India for receiving international payments. The reasons could be:
👉🏼 Indian Stripe accounts have limited international coverage and stricter documentation requirements.
👉🏼 Payouts are often slower, and global clients sometimes cannot pay in their local currency.
👉🏼 You don’t get the same level of marketplace integrations (Shopify, SaaS billing, subscription models) as U.S. businesses.
👉🏼 In India, services are invite-only and focus on supporting businesses with international expansion rather than local payments.
The workaround? By incorporating in the United States with a formation partner like doola, Indian entrepreneurs can unlock full Stripe access with U.S. banking, better client credibility, and integrations with business-critical platforms.
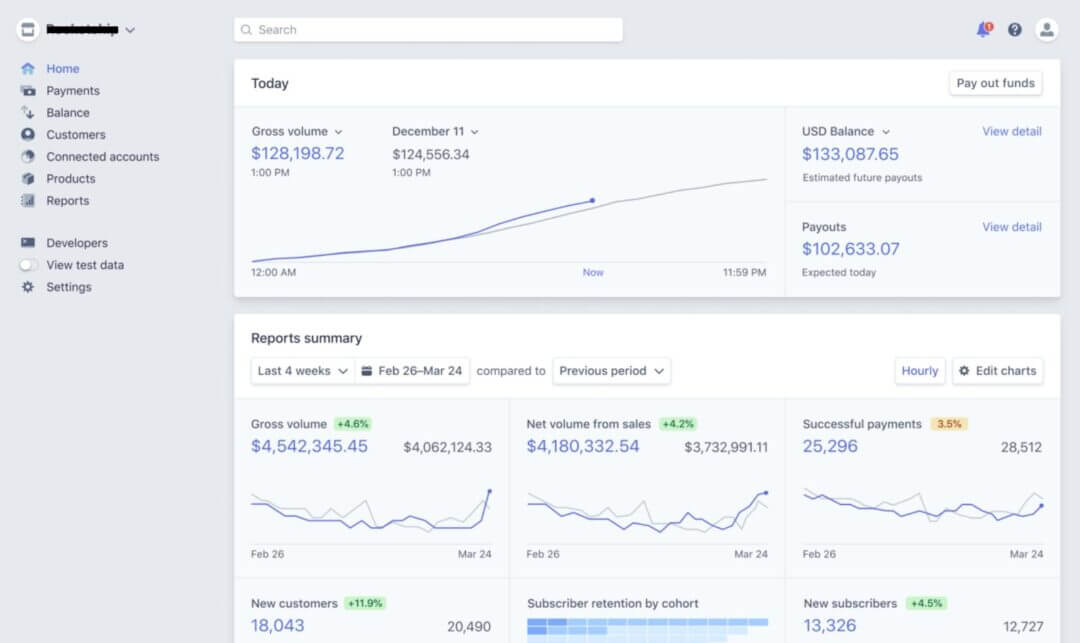
With doola, you can incorporate an LLC or C-Corp in the U.S., even while living in India.
Once formed, you receive:
- U.S. company registration documents (LLC or C-Corp).
- Employer Identification Number (EIN) from the IRS.
- U.S. bank account that links directly with Stripe.
- Compliance support (annual filings, tax reporting, bookkeeping).
This makes you eligible to apply for a Stripe U.S. account with full access, just like any other American company.
Step 1: Account Creation
✔️ Go to Stripe’s U.S. signup page.
✔️ Select U.S. as your country when registering.
✔️ Provide your EIN, U.S. address, and business bank account details.
Step 2: Business Verification
✔️ Upload incorporation documents.
✔️ Add your EIN letter and ID verification.
✔️ Connect your U.S. business checking account.
Step 3: Start Accepting Payments
✔️ Once approved, you can integrate Stripe into Shopify, WooCommerce, or your SaaS platform.
✔️ Payouts go directly into your U.S. bank, and you can later transfer funds to India as dividends or remittances in compliance with FEMA rules.
🔖 Related Read: Can’t Use Stripe? The Best Stripe Payment Processor Alternatives for International Startups in 2025
Wise (formerly TransferWise)
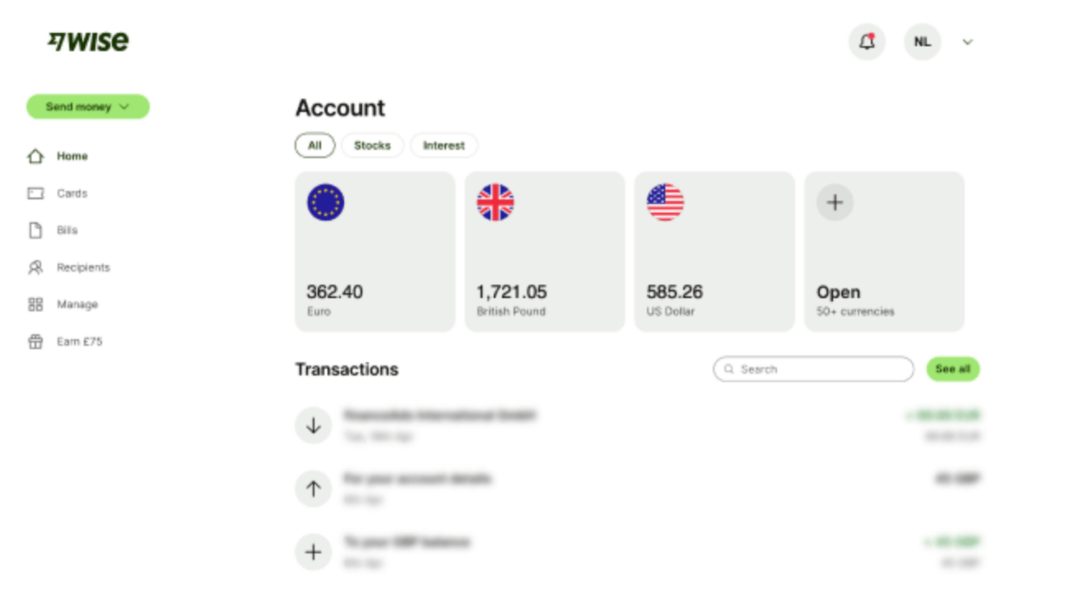
Unlike PayPal, it’s not built around invoices or marketplace integrations. It’s designed for direct bank transfers with transparent fees and real-time currency conversion.
This makes it ne of the cheapest and most transparent ways to receive international payments into India.
- Low-cost transfers: Wise charges between 0.6%–2% depending on the currency pair, which is much lower than PayPal’s ~4.4%.
- Real exchange rates: You get the mid-market forex rate with no hidden spreads, so you know exactly how much will land in your account.
- Fast settlement: Payments usually arrive in 1–2 business days, sometimes within hours.
- Simple for freelancers: Perfect for one-to-one client contracts, especially when clients prefer direct transfers over gateways.
Step 1: Account Creation
✔️ Go to Wise and sign up with your email address.
✔️ Choose Personal Account (freelancers can use this) or Business Account (if you have a registered entity).
✔️ Verify your identity by uploading a government-issued ID (PAN, passport, or Aadhaar) and proof of address (utility bill or bank statement).
✔️ Once verified, you’ll receive your Wise account details for multiple currencies (USD, EUR, GBP, etc.).
Step 2: Receiving Payments
✔️ Share your Wise bank details with clients. For example, you’ll get a U.S. routing number and account number for USD, an IBAN for EUR, and so on.
✔️ The client transfers money locally into that Wise account (they don’t pay international wire fees).
✔️ Wise converts the payment at the mid-market rate and credits your Wise balance in INR or in foreign currency.
Step 3: Withdrawing to Your Indian Bank
✔️ Log in to Wise and select Withdraw.
✔️ Enter your Indian bank account details (account number, IFSC code).
✔️ Choose whether to convert immediately to INR or hold foreign currency in your Wise balance.
✔️ Funds usually land in your Indian bank within 24–48 hours.
Understanding the FX Breakdown
Wise prides itself on transparent conversion.
If you invoice a U.S. client $1,000 and the mid-market rate is ₹83, Wise shows you exactly how much INR you’ll receive after fees. For example, $1,000 at ₹83 = ₹83,000. With a 1% fee (~$10), you’d receive around ₹82,170.
This transparency helps you quote clients more accurately and plan cash flow.
Payoneer
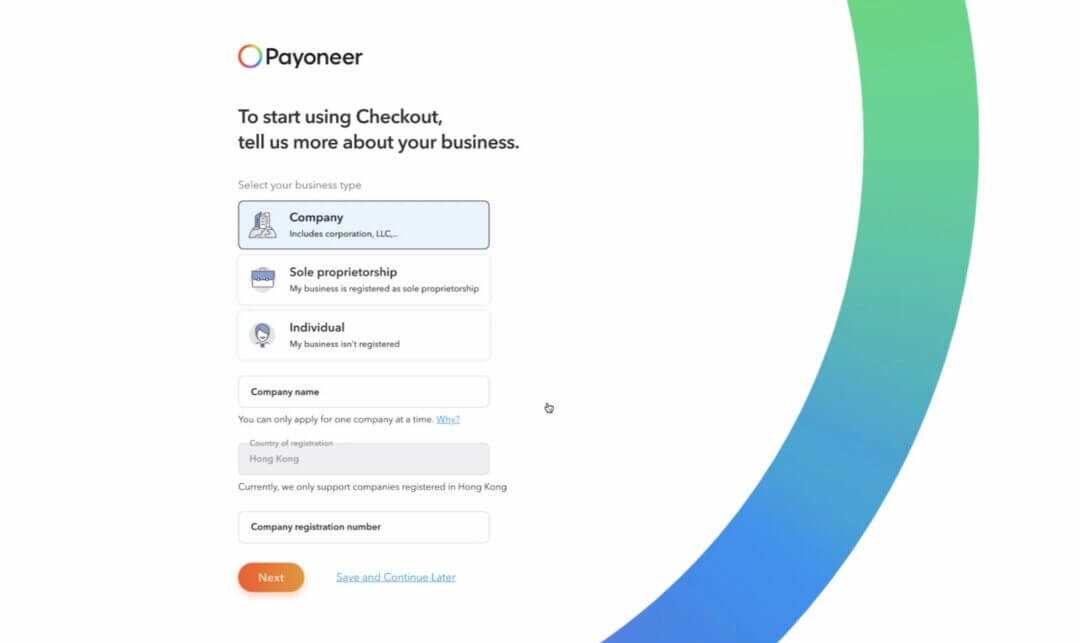
If your business is tied to global marketplaces or freelance platforms, Payoneer is one of the most seamless ways to get paid.
Unlike PayPal or Wise, which focus on direct client payments, Payoneer integrates directly into these platforms, making it easier to withdraw your earnings in India.
It takes care of currency conversion, integrates natively with major platforms, and offers better compliance support than tools like Wise.
- Many international platforms mandate or recommend Payoneer as their default payout partner.
- You can hold balances in USD, EUR, GBP, and other major currencies.
- Funds are routed to your Indian bank in INR, usually within 2–3 business days.
- Payoneer provides supporting documents for export compliance, which you can use during GST filings or audits.
Step 1: Account Creation & KYC
✔️ Visit Payoneer and click Sign Up.
✔️ Choose whether you’re registering as an Individual or Company.
✔️ Fill in your details: legal name, email address, and contact information.
✔️ Provide your PAN card and bank details for verification.
✔️ Upload proof of identity and proof of address (passport, Aadhaar, utility bill, or business registration certificate if applicable).
✔️ Wait for approval. Payoneer typically verifies accounts within a few business days.
Step 2: Connecting with Marketplaces
✔️ On platforms like Fiverr, go to the payout settings and select Payoneer as your withdrawal method.
✔️ On Amazon, link your Payoneer account to receive marketplace disbursements in your Payoneer USD/EUR account.
✔️ Your clients or marketplaces will pay into your Payoneer balance, which you can then withdraw to your local bank account.
Step 3: Withdrawing to Your Indian Bank
✔️ Log into Payoneer and check your balance in the relevant currency.
✔️ Click Withdraw → To Bank Account.
✔️ Choose the amount and currency for withdrawal.
✔️ Funds are converted at Payoneer’s exchange rate (includes ~2% spread over mid-market).
✔️ The INR equivalent is credited to your linked Indian bank within 2–3 business days.
Compliance & FIRC Support
Payoneer provides payment confirmation letters that act as proof of inward remittance. Some Indian banks may still require you to request an official FIRC or Inward Remittance Advice.
Keep all invoices, transaction IDs, and payment confirmations for GST compliance and to avoid issues under FEMA.
Razorpay International
Razorpay International is ideal for Indian e-commerce sellers and service providers who want to stay compliant while collecting international payments in multiple currencies.
It’s less flexible than Stripe (no U.S. payouts), but it keeps everything local and aligned with Indian regulations.
- Multi-currency support: Accept over 100 currencies including USD, GBP, EUR, AUD.
- Local setup: Built for Indian entities, so you don’t need to incorporate abroad.
- Seamless checkout: Clients can pay you via cards, net banking, UPI (for domestic), or international payment methods.
- Automatic compliance: Razorpay generates the required FIRC (Foreign Inward Remittance Certificate) automatically for each international transaction.
Step 1: Setup Process

✔️ Visit Razorpay and create a Razorpay Business Account.
✔️ Complete KYC verification by uploading your business PAN, GST certificate, and bank account proof.
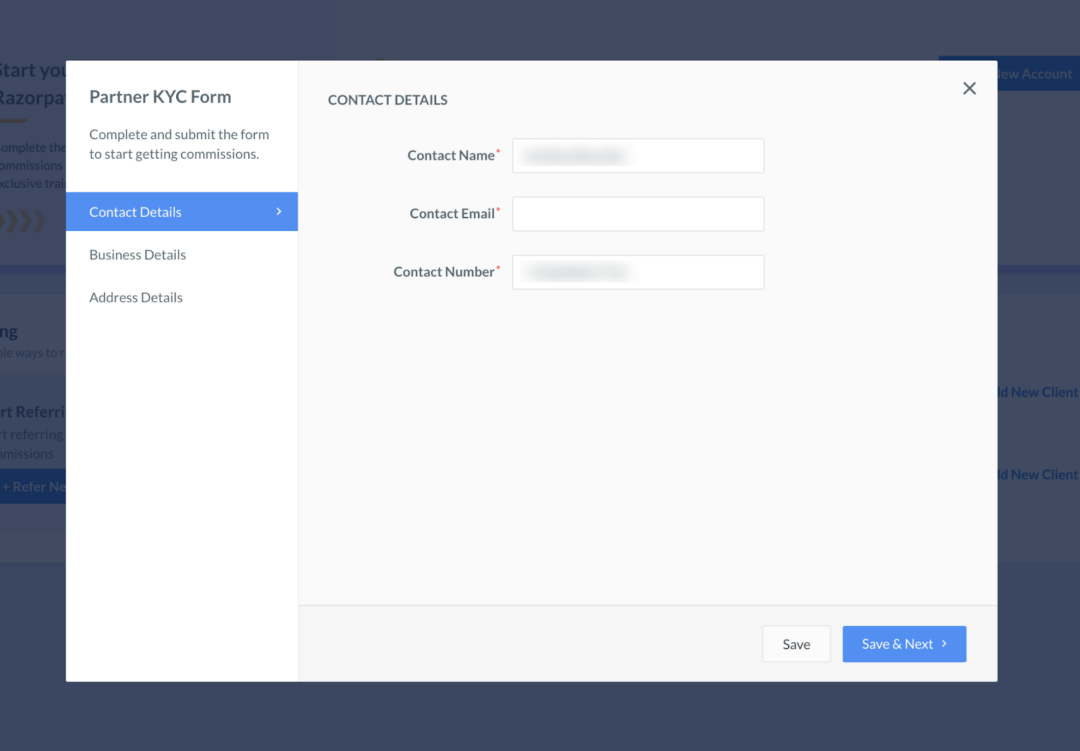
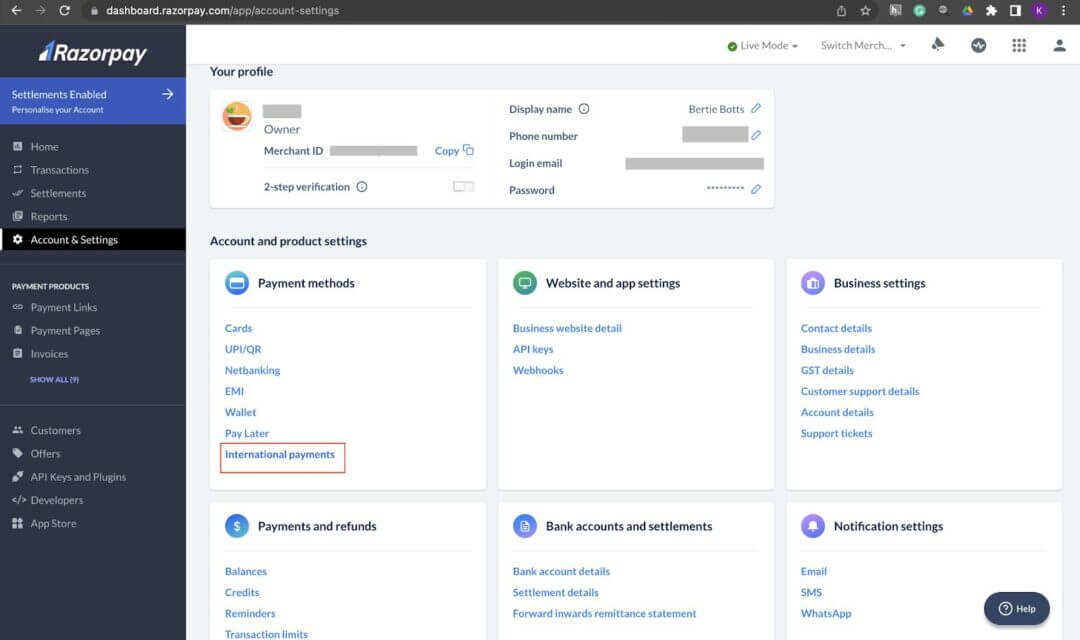
✔️ Once verified, enable the International Payments option in your dashboard.
✔️ Razorpay will request additional documents like IEC (Import Export Code) if you’re exporting goods. For services, your GST registration may be sufficient.
Step 2: Integrating Razorpay with Your Store
✔️ For E-commerce Stores: Razorpay provides plugins for Shopify, WooCommerce, Magento, and other major platforms. Simply install the plugin, connect your Razorpay account, and start accepting global payments.
✔️ For Service Providers: You can generate payment links or create a hosted checkout page to send directly to clients via email or WhatsApp.
✔️ For Custom Platforms: Use Razorpay’s API to embed payment flows into your website or SaaS product.
Step 3: Payment and Settlement Flow
✔️ Customer pays in their local currency (say $1,000 USD).
✔️ Razorpay processes the payment and converts it into INR using bank forex rates.
✔️ The INR equivalent (minus fees of ~2–3% per transaction) is settled into your linked Indian current account within 2–5 business days.
✔️ An automatic FIRC certificate is generated and available for download in your dashboard, which helps during GST compliance and audits.
All payments processed via Razorpay are export proceeds under FEMA, so funds must be realized within RBI timelines.
Razorpay’s automatic FIRC generation means you won’t have to request documents from banks but you’ll need to issue GST-compliant invoices for each export transaction.
Direct Bank Wire Transfers
Direct bank wires are the gold standard for credibility and compliance, but they are slower and more expensive than modern gateways. They’re best for:
- Best for large invoices ($5,000+) where clients prefer a formal banking route.
- Essential for B2B contracts where compliance documentation is critical.
- Not cost-efficient for smaller freelancer payments, where fees can eat up a large percentage.
They’re often processed through the SWIFT (Society for Worldwide Interbank Financial Telecommunication) network, one of the most reliable ways to receive international payments.
While they’re trustworthy, they come with higher costs and more paperwork compared to modern gateways like Wise or Payoneer.
If you’re handling enterprise-level clients or bulk payments, they’re worth the cost. For smaller payments, use them sparingly and lean on tools like Wise or Payoneer.
✔️ Your client initiates a wire transfer from their local bank.
✔️ The payment is routed through one or more correspondent banks until it reaches your Indian bank (e.g., ICICI, HDFC, SBI).
✔️ The funds are credited to your current account (or savings account for individuals), usually in 2–7 business days.
✔️ Your bank converts the foreign currency into INR using its own exchange rate, which usually includes a 1–3% spread over the mid-market rate.

Fees and Deductions
On a $10,000 transfer, you could easily lose $200–$300 in combined fees and conversion costs.
- Sender’s bank fee: $20–$40 on average, depending on their bank.
- Intermediary bank charges: Sometimes $10–$20, deducted before funds reach you.
- Receiving bank fee: Indian banks may charge ₹500–₹1,000 per inward remittance.
- Forex conversion markup: Banks typically add 1–3% above the mid-market rate.
Tax Implications and Compliance
When you receive export income via bank wire, you must:
- Issue a GST-compliant invoice (if registered under GST). Exports are considered zero-rated, meaning you can claim ITC (Input Tax Credit) or apply for a GST refund.
- Report under FEMA regulations, ensuring export proceeds are realized within nine months.
- Check for TDS (Tax Deducted at Source): Some foreign clients deduct taxes at their end. To avoid double taxation, you may need to rely on Double Taxation Avoidance Agreements (DTAA).
Steps to Obtain FIRC (Foreign Inward Remittance Certificate)

Unlike gateways like Wise, banks automatically issue FIRCs or equivalent documents for wire transfers. This is one of the main reasons B2B exporters prefer SWIFT wires.
✔️ After the payment arrives, request an FIRC/Advice from your bank’s foreign exchange branch.
✔️ Provide transaction details: UTR number, date, amount, and sender details.
✔️ The bank will issue a digital or physical FIRC confirming the inward remittance.
✔️ Keep FIRCs on file since they are mandatory proof for GST refunds and for showing export compliance to RBI.
While PayPal, Stripe, Wise, Payoneer, Razorpay, and bank wires cover most international payment needs, there are some niche platforms that can be useful depending on your business model and client base.
Solutions like Skrill, WorldRemit, and Instamojo Global can work in very specific situations, but they are not long-term strategies for scaling.
👉🏼 Skrill is a digital wallet and payments platform that is popular in the gaming, betting, and affiliate marketing industries, but less so for mainstream e-commerce or SaaS.
👉🏼 WorldRemit is primarily a remittance platform that’s designed for quick person-to-person transfers rather than structured business receipts.
👉🏼 Instamojo started as a local Indian payment solution but has rolled out global acceptance features. It lets Indian businesses create payment links that international clients can pay via cards.
Compliance & Legal Essentials for Receiving International Payments
Compliance is the backbone of international business. Without the right paperwork, your funds can get delayed, or worse, flagged by regulators.
- Banks may hold or reject payments if invoices and FIRCs don’t match.
- Late realization of export proceeds can attract fines.
- Without zero-rated invoices and FIRCs, you risk losing ITC claims.
- Missing documentation can trigger deeper scrutiny during tax audits.
FEMA Checklist for International Receipts
The Foreign Exchange Management Act (FEMA) governs how money flows into India. When you receive export income (services or goods), you’re required to:
- Realize export proceeds within nine months from the date of invoice.
- Receive funds only through authorized banking channels (PayPal, Razorpay, Wise, SWIFT, etc.).
- Maintain documentation like contracts, invoices, and FIRCs for each transaction.
- Report large inflows if requested by your bank or RBI.
GST on Export of Services and Goods
Exports are treated as zero-rated supplies under GST. That means you don’t charge GST on invoices to foreign clients, but you must still:
- Issue GST-compliant invoices marked as “Export of Services/Goods.”
- File GST returns declaring your export sales.
- Claim Input Tax Credit (ITC) or apply for refunds on the GST you paid on domestic inputs.
- Ensure your invoices match FIRCs so your tax filings are audit-proof.
TDS (Tax Deducted at Source) Considerations
Some foreign clients deduct tax at their end before sending payment. For example, a U.S. client may deduct 10–15% as withholding tax.
- You’ll receive less than your invoice value, but you can claim credit in India under DTAA (Double Tax Avoidance Agreement) if documentation is provided.
- Always request Form 1042-S (U.S.) or equivalent certificates from clients to claim credit.
To avoid compliance headaches, your invoices should always include your business name, address, GSTIN (if registered), client details, including billing address and tax ID.
| Complete International Payment Compliance Checklist ✅ Issue a GST-compliant invoice marked as “Export of Services/Goods.” ✅ Ensure client payment flows through an authorized channel (PayPal, Wise, Razorpay, SWIFT). ✅ Collect FIRC/Bank Advice for each payment. ✅ Match FIRCs with invoices for GST returns. ✅ Track payment timelines to stay within FEMA’s 9-month limit. ✅ Maintain copies of contracts, invoices, FIRCs, and bank statements for 5+ years. ✅ For withheld taxes abroad, obtain certificates to claim DTAA credit. |
How Incorporating in the U.S. Unlocks Global Payment Options
For many Indian entrepreneurs, incorporating a U.S. entity opens access to gateways that aren’t available in India, such as direct entry into the U.S. banking system and immediate credibility with overseas clients.
| Before U.S. Entity vs. After U.S. Entity: Payment Options Unlocked | |
| Indian Entity → Limited gateways + high fees → Lower trust | U.S. Entity → Stripe/Square + U.S. bank + Global Integrations → High trust + lower cost |
| Limited access to Stripe, Square, and other global-first gateways.
Higher fees on PayPal and Payoneer. Forex losses on every transfer. Fewer integrations with e-commerce and SaaS platforms. |
Full access to Stripe and Square accounts with U.S. bank payouts.
Ability to open a U.S. business bank account (Chase, Mercury, etc.). Seamless integrations with Shopify, Amazon, and SaaS billing tools. Lower transaction fees and stronger client confidence. |
What Improves With a U.S. Entity
- Stripe Access: Full-feature accounts with multi-currency support and direct settlement in USD. Perfect for SaaS, subscriptions, and e-commerce.
- Square Access: Enables global card payments and in-person options for those expanding offline.
- U.S. Banking: Collect client payments directly into a U.S. checking account, hold USD, and transfer strategically to India.
- Lower Costs: Avoid repeated forex conversion fees and PayPal’s heavy markup.
- Trust & Credibility: Sending an invoice from “XYZ LLC (Delaware)” feels safer for a U.S. or European client than wiring money to an individual in India.
What are The Alternatives: UK and Singapore Entities
While the U.S. is the most popular choice, some founders consider incorporating in the UK or Singapore. Here’s a quick comparison:
| Jurisdiction | Pros | Cons |
| U.S. | Global trust, access to Stripe/Square, fast setup with doola, strong investor familiarity | Requires ongoing compliance and U.S. tax filings |
| UK | Easy incorporation, Payoneer/Stripe UK access, EU trade benefits | Stricter VAT compliance, Brexit-related complexities |
| Singapore | High global credibility, fintech-friendly, strong Asia-Pacific access | More expensive setup, stricter residency rules |
How doola Empowers Indian Entrepreneurs Globally

At doola, we don’t just help you register a U.S. business. We also help you set up, scale, and stay compliant every step of the way.
Just choose your preferred structure (LLC or C-Corp), and we’ll handle the paperwork and file your formation documents in the U.S.
We make sure that you receive your U.S. incorporation certificate, business address, and official setup documents in no time.
We’ll also help you obtain an EIN (Employer Identification Number) from the IRS, apply for an ITIN (Individual Taxpayer Identification Number), and open a U.S. business bank account.
With your U.S. entity and bank account ready, you can quickly set up Stripe, Square, and PayPal U.S. accounts and accept payments like a U.S.-based business.
We don’t stop at incorporation, and ensure you stay compliant with FIRCs, invoices, compliance reports, annual filings, bookkeeping, and taxes.
With our support, you’re ready for audits, investor due diligence, or global scaling at any time.
Launch your U.S. entity with doola today and accept international payments with confidence.
FAQs

What is the easiest way to accept international payments in India?
PayPal and Wise are often the easiest options since they require minimal setup and are globally recognized.
However, they can be expensive due to high fees and forex spreads.
Can I use Stripe in India for international payments?
Not directly. Stripe isn’t fully available in India for global transactions.
To unlock full access, many Indian founders incorporate a U.S. entity through formation services like doola.
With a U.S. company, you can open a U.S. bank account and set up Stripe just like an American business.
What are the RBI rules for receiving international payments in India?
The Reserve Bank of India (RBI) regulates cross-border payments under FEMA. Key rules include:
- Export proceeds must be realized within 9 months of invoicing.
- Payments must flow through authorized banking channels.
- Entrepreneurs must collect FIRCs (Foreign Inward Remittance Certificates) for compliance.
- GST-compliant invoices must be issued even though exports are “zero-rated.”
How do freelancers in India get paid by U.S. clients?
Clients can pay in USD, which gets converted into INR and credited to their Indian bank account.
For larger contracts, some freelancers prefer SWIFT bank wires to receive payments directly with FIRCs for compliance.
Is PayPal the best option for international payments in India?
PayPal is easy to set up and widely recognized, but it’s also one of the most expensive options due to its 4–5% transaction fees and forex markup.
For better rates, consider Wise, Razorpay, or incorporating abroad to use Stripe.
How do I reduce high transaction fees when receiving foreign payments?
Use Wise for direct transfers at real exchange rates or negotiate with clients to cover PayPal or wire fees.
You can also open a U.S. business entity to access Stripe/Square and reduce forex conversions.
Can an Indian business open a U.S. company to accept international payments more easily?
Yes, any Indian entrepreneur can form a U.S. LLC to get a U.S. bank account and bill their U.S. clients easily in USD to get paid quickly.


